This guide covers creating passes via CSV upload in the PassEntry Dashboard. If you want to create passes programmatically or integrate bulk issuance into
automated workflows, see the Batch Pass Creation API documentation.
Creating a Batch via CSV
Head over to the Bulk Operations section, you will find “Create via CSV” button. Then, create a new batch. Optionally enter a batch name, and select the pass template you want the passes to be created under.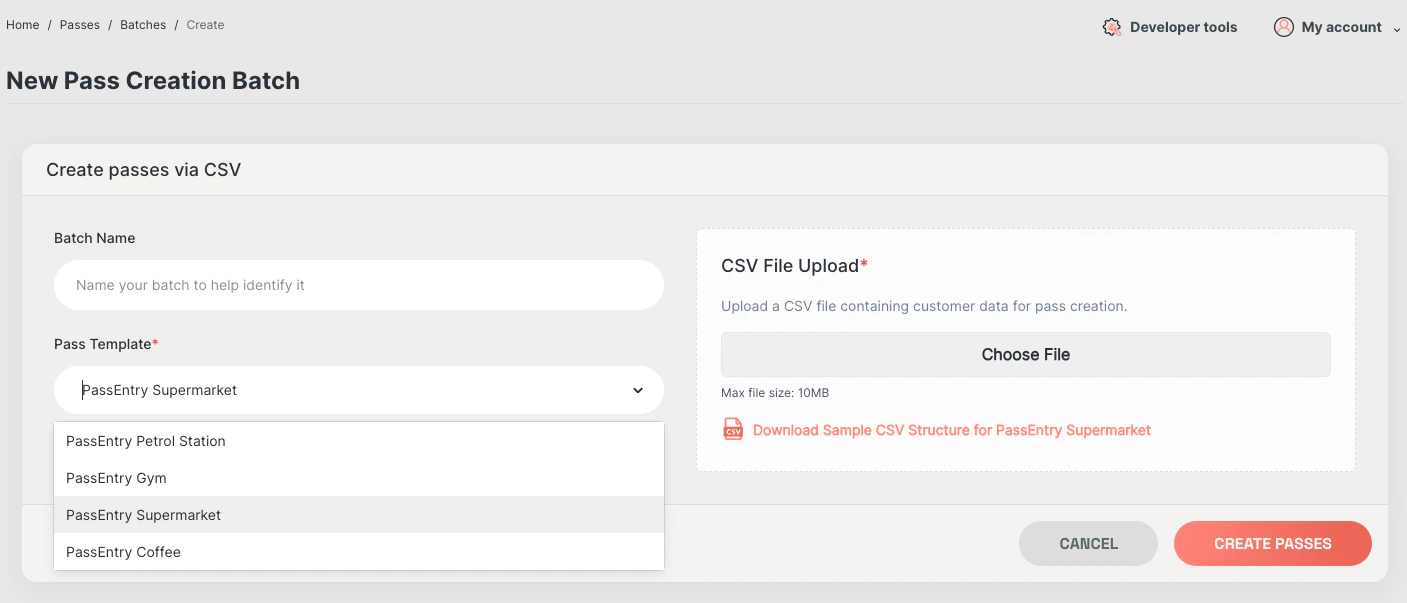
Configuration
Fixed headers
For more information on the functionality of each field, please refer to the API Reference.| Column Name | Description | Required? | Example | Type |
|---|---|---|---|---|
| ext_id | External ID for the pass | Yes | Pass12345 | Text (Any) |
| group_tags | Comma separated tags to group passes | No | summer_offer_24 | Text (Any) |
| nfc_enabled | Boolean to enable NFC | No | true | Boolean (true or false) |
| nfc_source | Source of NFC data | No | extId | Text (extId or uuid or custom) |
| nfc_custom_value | Custom value for NFC, nfc_source must be set to custom | No | summer_20_off | Text (any) |
| barcode_enabled | Boolean to enable barcode | No | true | Boolean (true or false) |
| barcode_type | Type of barcode | No | qr | Text (qr, code128, aztec or pdf417) |
| barcode_source | Source of barcode | No | extId | Text (extId, uuid or custom) |
| barcode_value | Value for the barcode, barcode_source must be set to custom | No | abcd12345 | Text (Any) |
| barcode_display_text | Boolean to display barcode value as text | No | true | Boolean (true or false) |
| expires_at | Expiration date and time for the pass | No | 2024-08-14T18:12:11Z | Datetime in iso8601 format |
| override_background_color | Override the background colour of the pass. Restrictions apply depending on device and template type | No | #000000 | Text (hex colour code) |
| override_label_color | Override the label colour of the pass. Restrictions apply depending on device and template type | No | #FFFFFF | Text (hex colour code) |
| override_text_color | Override the text colour of the pass. Restrictions apply depending on device and template type | No | #FFFFFF | Text (hex colour code) |
| override_banner_image_asset_id | UUID of a processed Image Asset to use as the banner image | No | f47ac10b-58cc-4372-a567-0e02b2c3d479 | Text (UUID) |
| override_logo_image_asset_id | UUID of a processed Image Asset to use as the logo image | No | f47ac10b-58cc-4372-a567-0e02b2c3d479 | Text (UUID) |
| override_thumbnail_image_asset_id | UUID of a processed Image Asset to use as the thumbnail image (generic passes only) | No | f47ac10b-58cc-4372-a567-0e02b2c3d479 | Text (UUID) |
Template override columns require template overrides to be enabled for your organisation. Image assets must be uploaded and fully processed before they can be referenced by UUID. See the Image Assets guide for details.
Dynamic headers
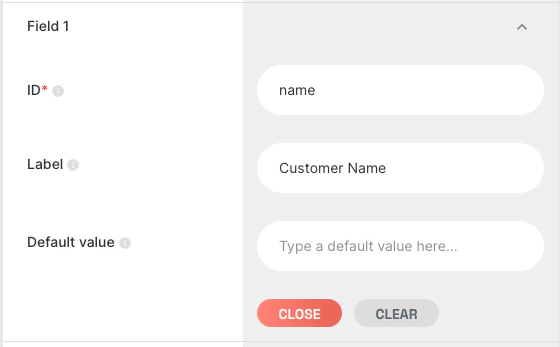
As each template might have custom fields, this can be identified and set via custom, dynamic headers. When creating a template, you set anID for each field.
This can then be targeted in your CSV by including the prefix passfield_ followed by your template ID.
Example:
In your pass template, you’ve chosen to display Field 1 as “Customer Name”, and given it the ID of “name”.
Then, for each row in your CSV, you’ve entered a different name, to correspond with the data downloaded from your system.
In which case, your CSV would need to have a row called passfield_name
Special Characters and Markdown
When working with CSV files that include special characters such as commas, quotes, or line breaks—and especially when embedding HTML or markdown-style content—it’s important to format fields correctly to ensure they are parsed reliably. Follow these rules:- Commas (
,): Wrap the entire field in double quotes ("). - Line breaks (
\n): Wrap the entire field in double quotes ("). - Double quotes (
") inside fields: Use double quotes around the field, and escape inner quotes by doubling them (""). - Markdown or HTML: Use double quotes around the full field, and use single quotes inside HTML attributes to avoid quote conflicts, or escape double quotes if needed.
| Desired Field Content | CSV-Compliant Value |
|---|---|
| London, UK | ”London, UK” |
| London\nUK (line break) | “London\nUK” |
<a href="https://example.com">Link</a> | "<a href='https://example.com'>Link</a>" |
| ”Quoted Text" | """Quoted Text""" |
<a href="https://example.com">"Link"</a> | "<a href='https://example.com'>""Link""</a>" |
Results
Once you’ve uploaded your CSV, you’ll be able to track the progress of your batch on the Passes page.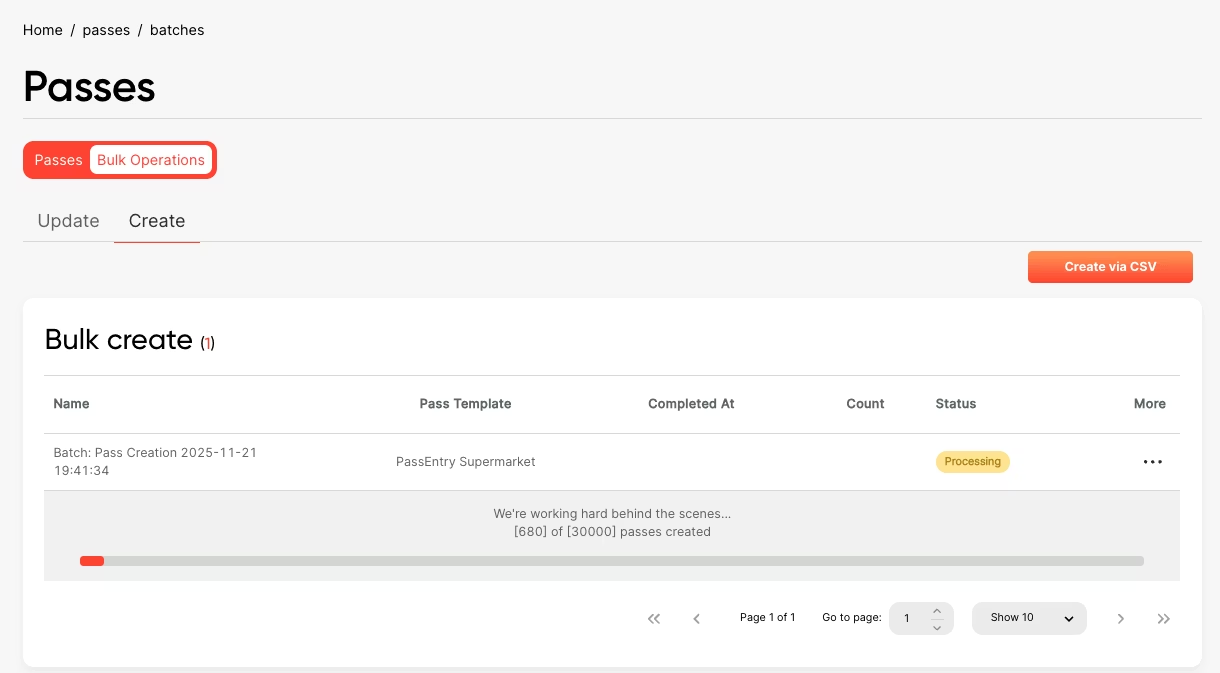
| ext_id | uuid | download_url |
|---|---|---|
| Pass12345 | 1234567890 | https://download.passentry.com/download?pass=1234567890 |
| Pass12346 | 1234567891 | https://download.passentry.com/download?pass=1234567891 |