Zapier Integration Guide
With Zapier, you can connect PassEntry to your existing tools like CRMs, e-commerce platforms or marketing automation systems – in just a few clicks. No code needed. Build powerful, automated workflows (called Zaps) to issue, update, deactivate, or react to pass events in real time based on customer actions.
When to Use Zapier vs the PassEntry API
Use Zapier when you want to automate pass workflows from existing business tools like CRMs, e-commerce platforms or marketing systems without writing code. Zapier is ideal for event-driven workflows such as issuing passes when a customer is created, updating passes based on subscription changes or reacting to wallet events.
Use the PassEntry API when you need full control, custom logic or high-volume operations. The API is better suited for building your own backend integrations, handling complex validation rules or issuing and updating passes at scale.
What You Can Do
Use PassEntry’s Zapier app to:
- Issue passes to users from your CRM or e-commerce platform
- Update pass data (name, status, balance, barcode, location, etc.)
- Receive real-time pass status updates (e.g. added to wallet, removed, scanned)
- Manage loyalty balances (add/redeem/override points)
- Deactivate passes when users unsubscribe, churn, or complete an event
🛎️ Available Triggers
Pass Created
Fires when a new pass is issued in PassEntry. Perfect for sending welcome emails, creating CRM records, or starting onboarding workflows.
New Pass Added to Wallet
Fires when a pass is added to a user’s Apple Wallet or Google Wallet. Ideal for tracking activations or triggering follow-up actions, e.g. sending a welcome push notification.
Pass Removed From Wallet
Fires when a user removes a pass from their wallet. Can be used for re-engagement campaigns or tracking churn.
Pass Scanned
Fires when a pass is scanned using NFC or barcode. Works well for check-in systems, loyalty programs, and access control.
Pass Status Changed
Fires when a pass is added to or removed from a customer’s wallet. Covers both events in one trigger – useful for monitoring wallet activity.
🛠️ Available Actions
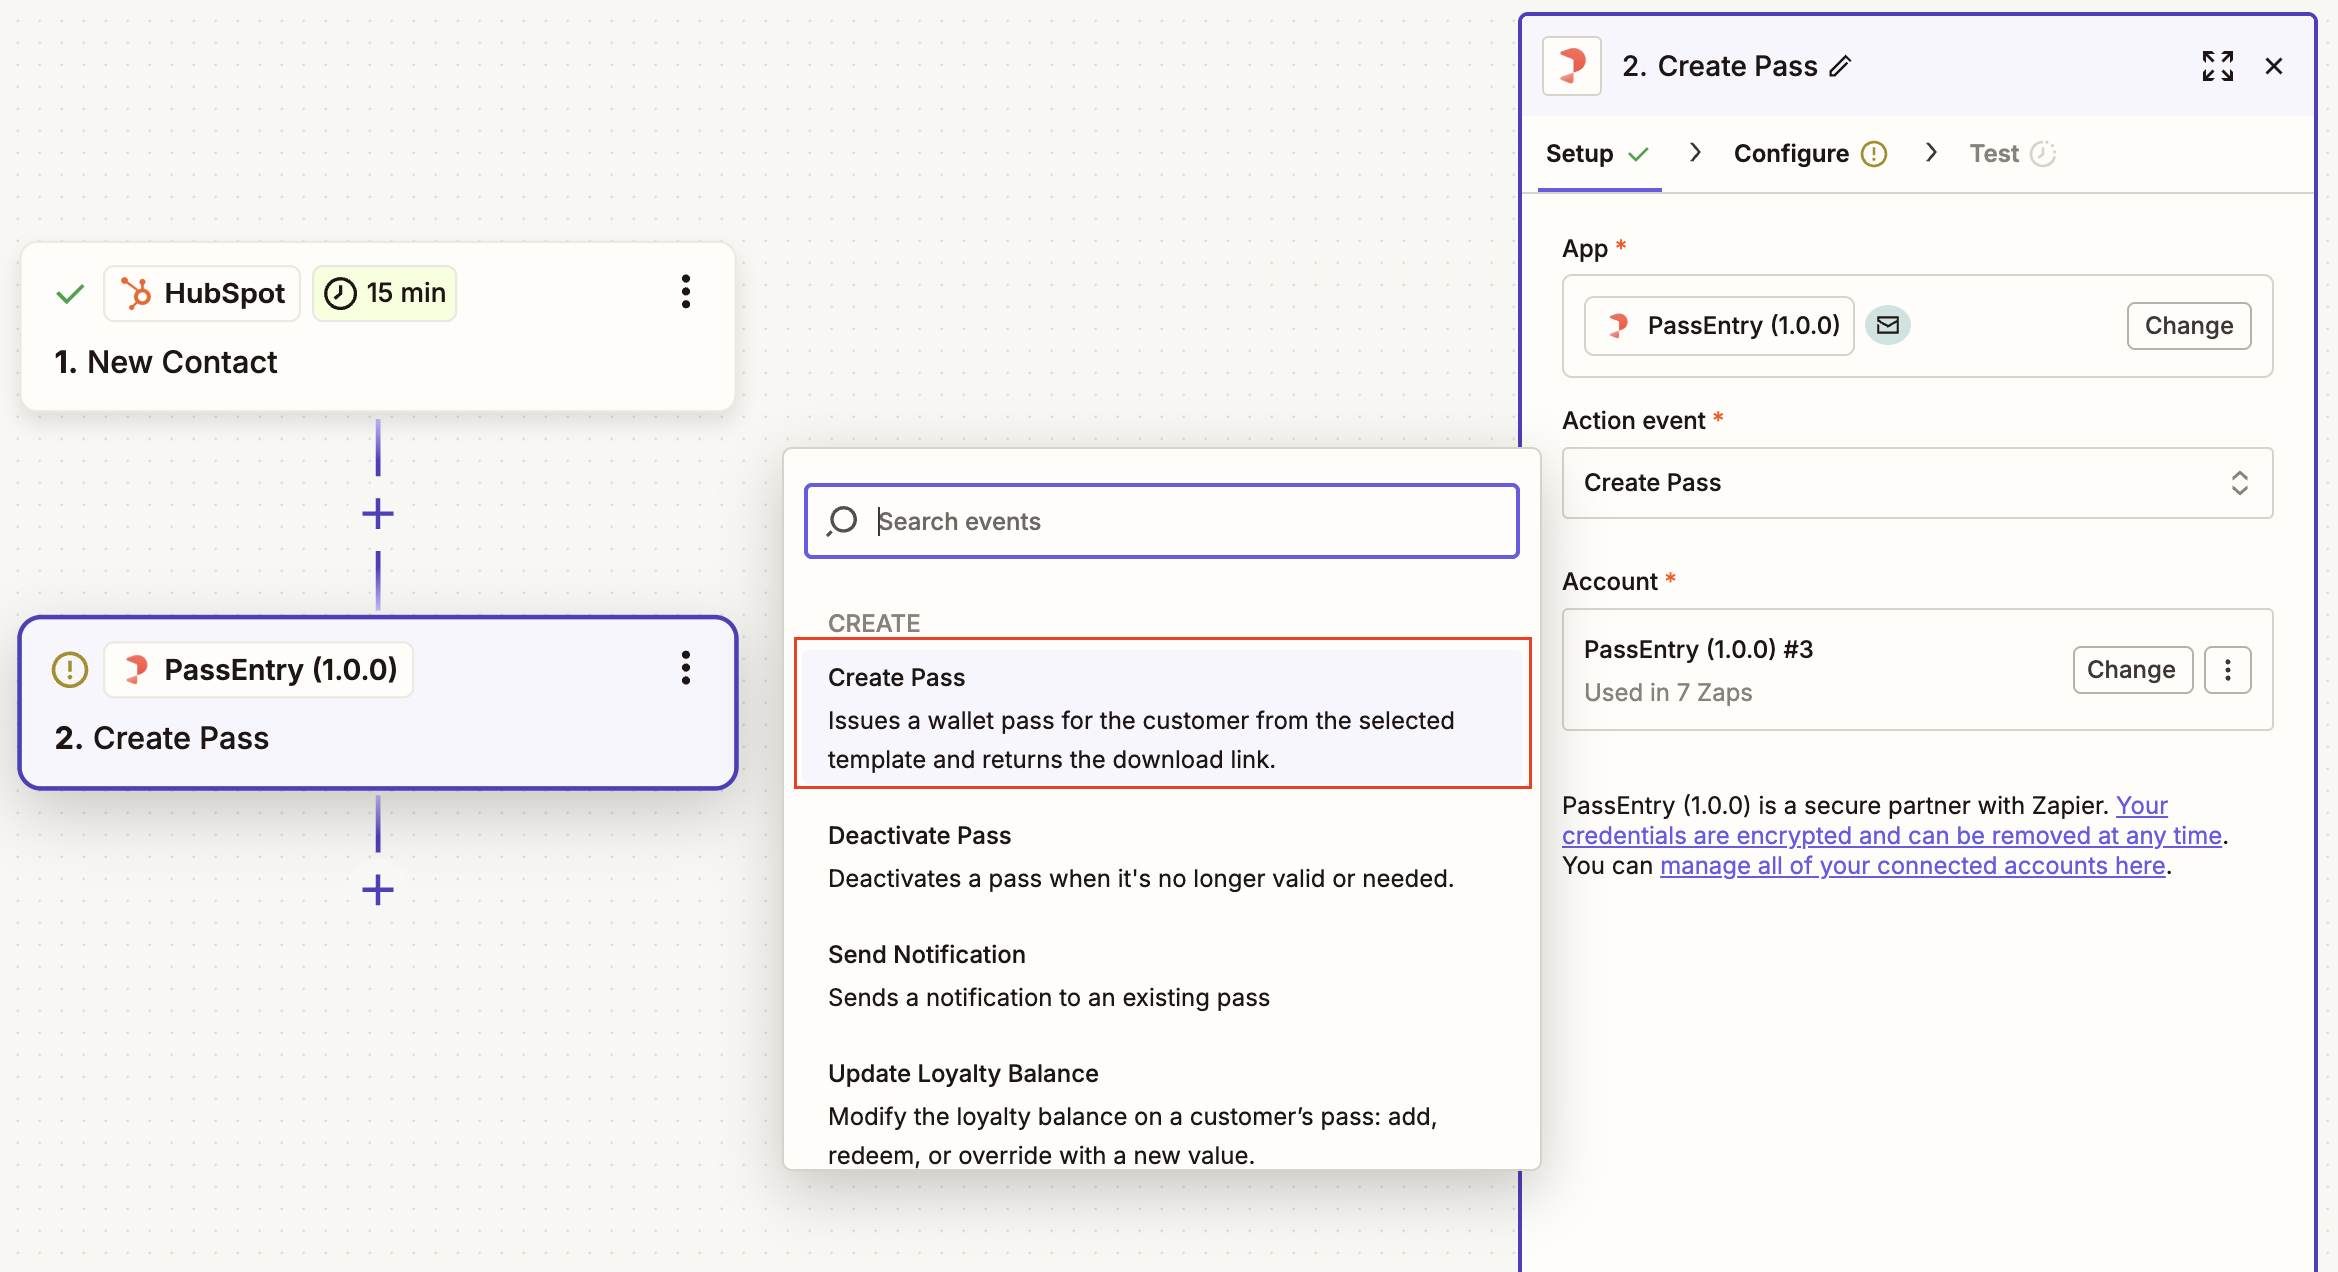
Create Pass
Issues a new pass using a selected pass template. You’ll map values from your CRM or another app into the pass fields.
Before setting up your Zap, please make sure to create a pass template via PassEntry API or Dashboard. This template will appear in the Pass Template dropdown field in Zapier.
Update Pass
Updates specific fields for an existing pass based on External ID. Only include the values you want to change – everything else will remain unchanged.
If you use multiple pass templates (e.g. for different membership tiers), set up a separate Zap path or Zap for each one.
Each path must use the correct template ID – changes made using a mismatched template will be rejected.
This ensures the right dynamic fields are used and your updates go to the correct pass type.
Update Loyalty Balance
Adds, redeems, or overrides a pass’s loyalty balance. Ideal for e-commerce and reward engines.
Make sure to enable Loyalty Balance when creating your pass template in PassEntry.
Also, choose the correct number type – integer or decimal – based on the values your system will send.
If the types don’t match, the update may fail.
Deactivate Pass
Marks a pass as deactivated. Use this when:
- A subscription ends
- An event finishes
- A user opts out
🔍 Searches
Search Pass
Looks up a pass using an External ID or UUID. Returns full pass details including status and download link.
Use this as an intermediate step in a Zap when:
- You need to retrieve the template ID before performing a dynamic update (e.g. mapping fields based on the pass structure).
- You want to verify that a pass exists before attempting to update or deactivate it.
- You want to branch workflows based on the pass status (e.g. only continue if the pass is active).
- You need to retrieve the download URL to send it via email or SMS.
- You want to use pass metadata (template name, balance, expiration, etc.) in downstream actions.
🪄 Set Up Your First Workflow
Set up a simple Zapier workflow to issue a digital pass when a new contact is created in your CRM.
📝 Requirements
- A PassEntry account with at least one published pass template.
- Zapier account (free or paid depending on your task volume and complexity).
- API Key from PassEntry Dashboard.
1. Create a Pass Template in PassEntry
- Log into your PassEntry Dashboard
- Create a new pass template (e.g. “Gold Membership”, “Event Ticket”) if you don’t have one
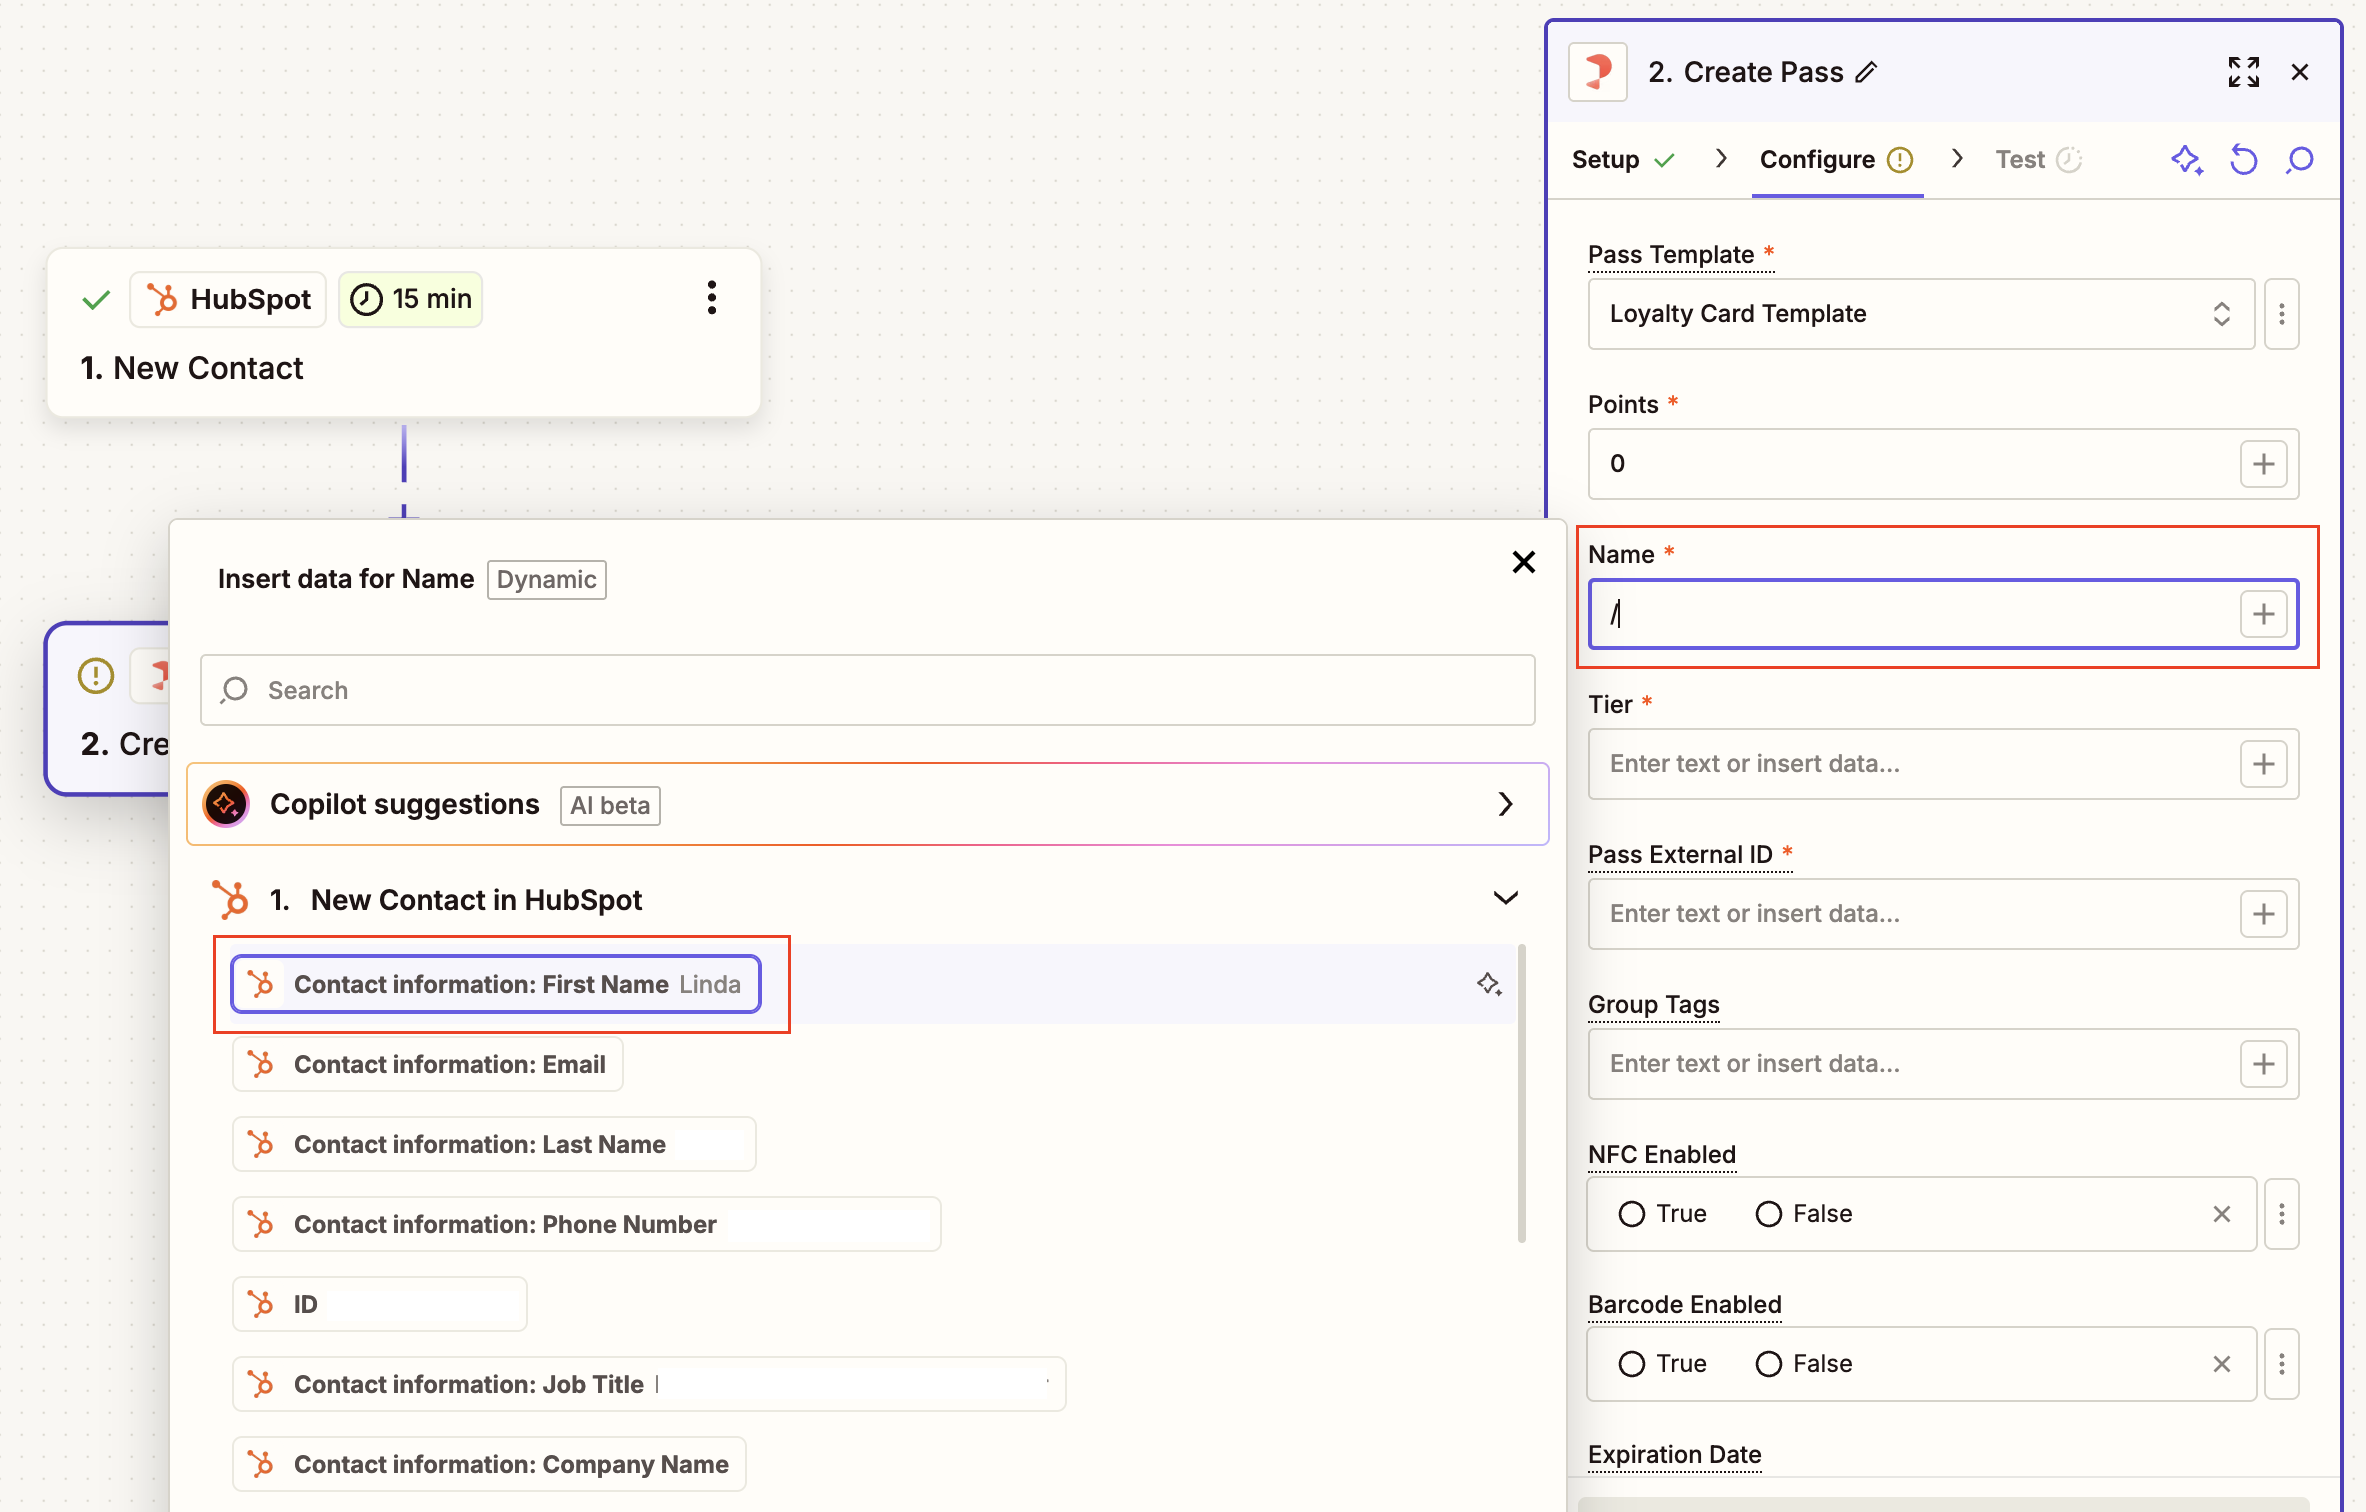
Make sure the template includes all the fields you want to populate from your CRM, like name, membership level, loyalty balance etc.
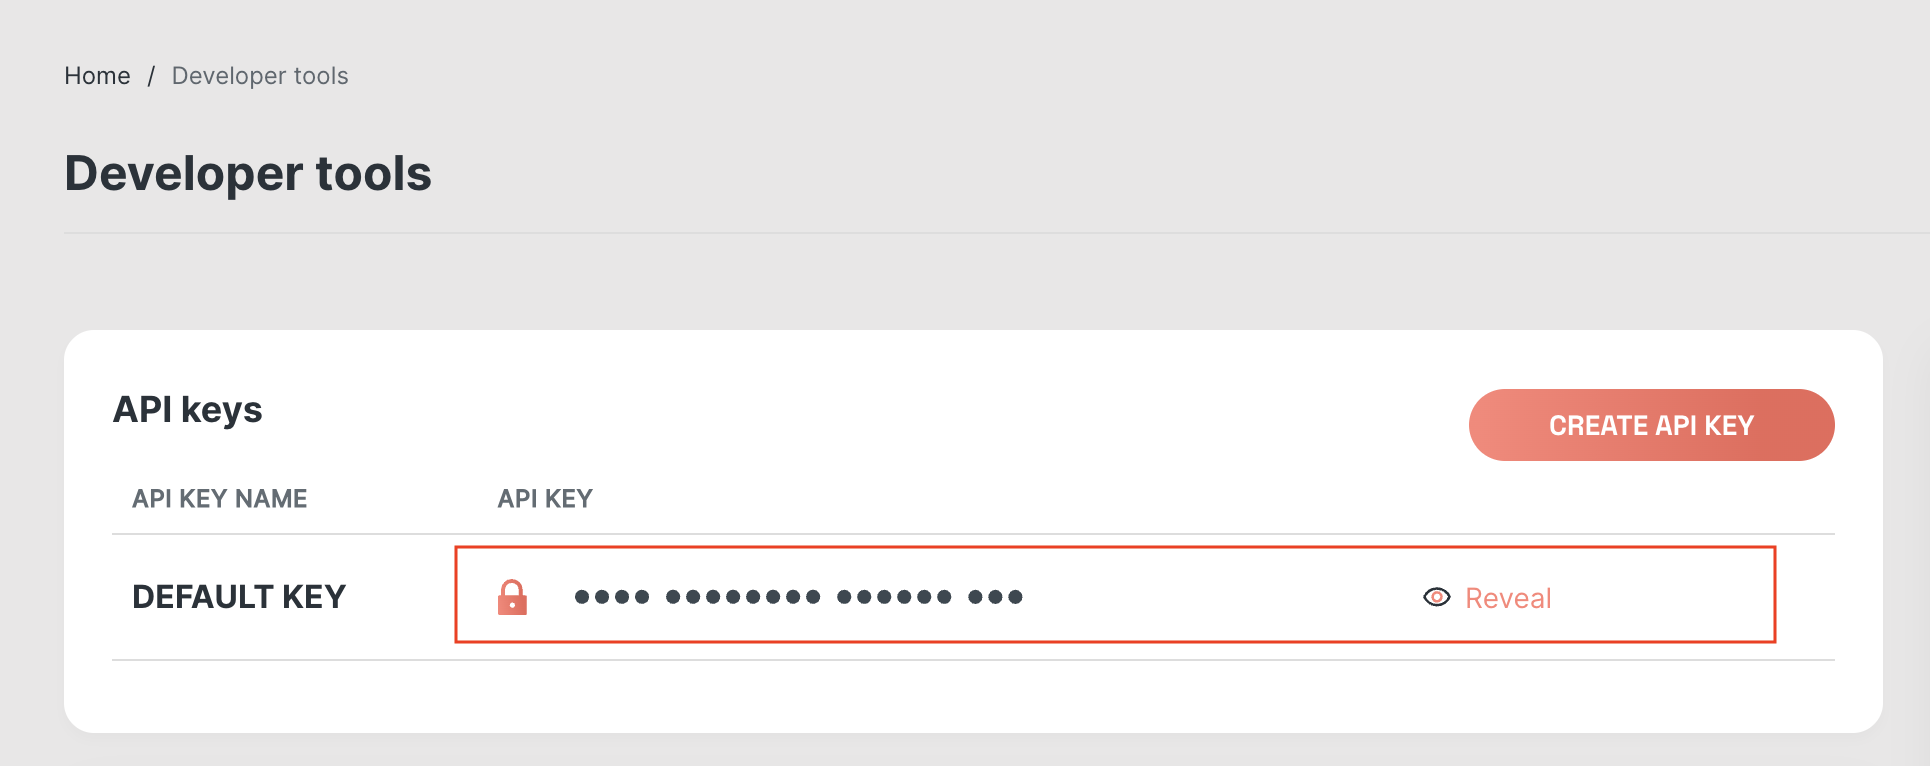
- Head to Developer Tools and copy your API Key
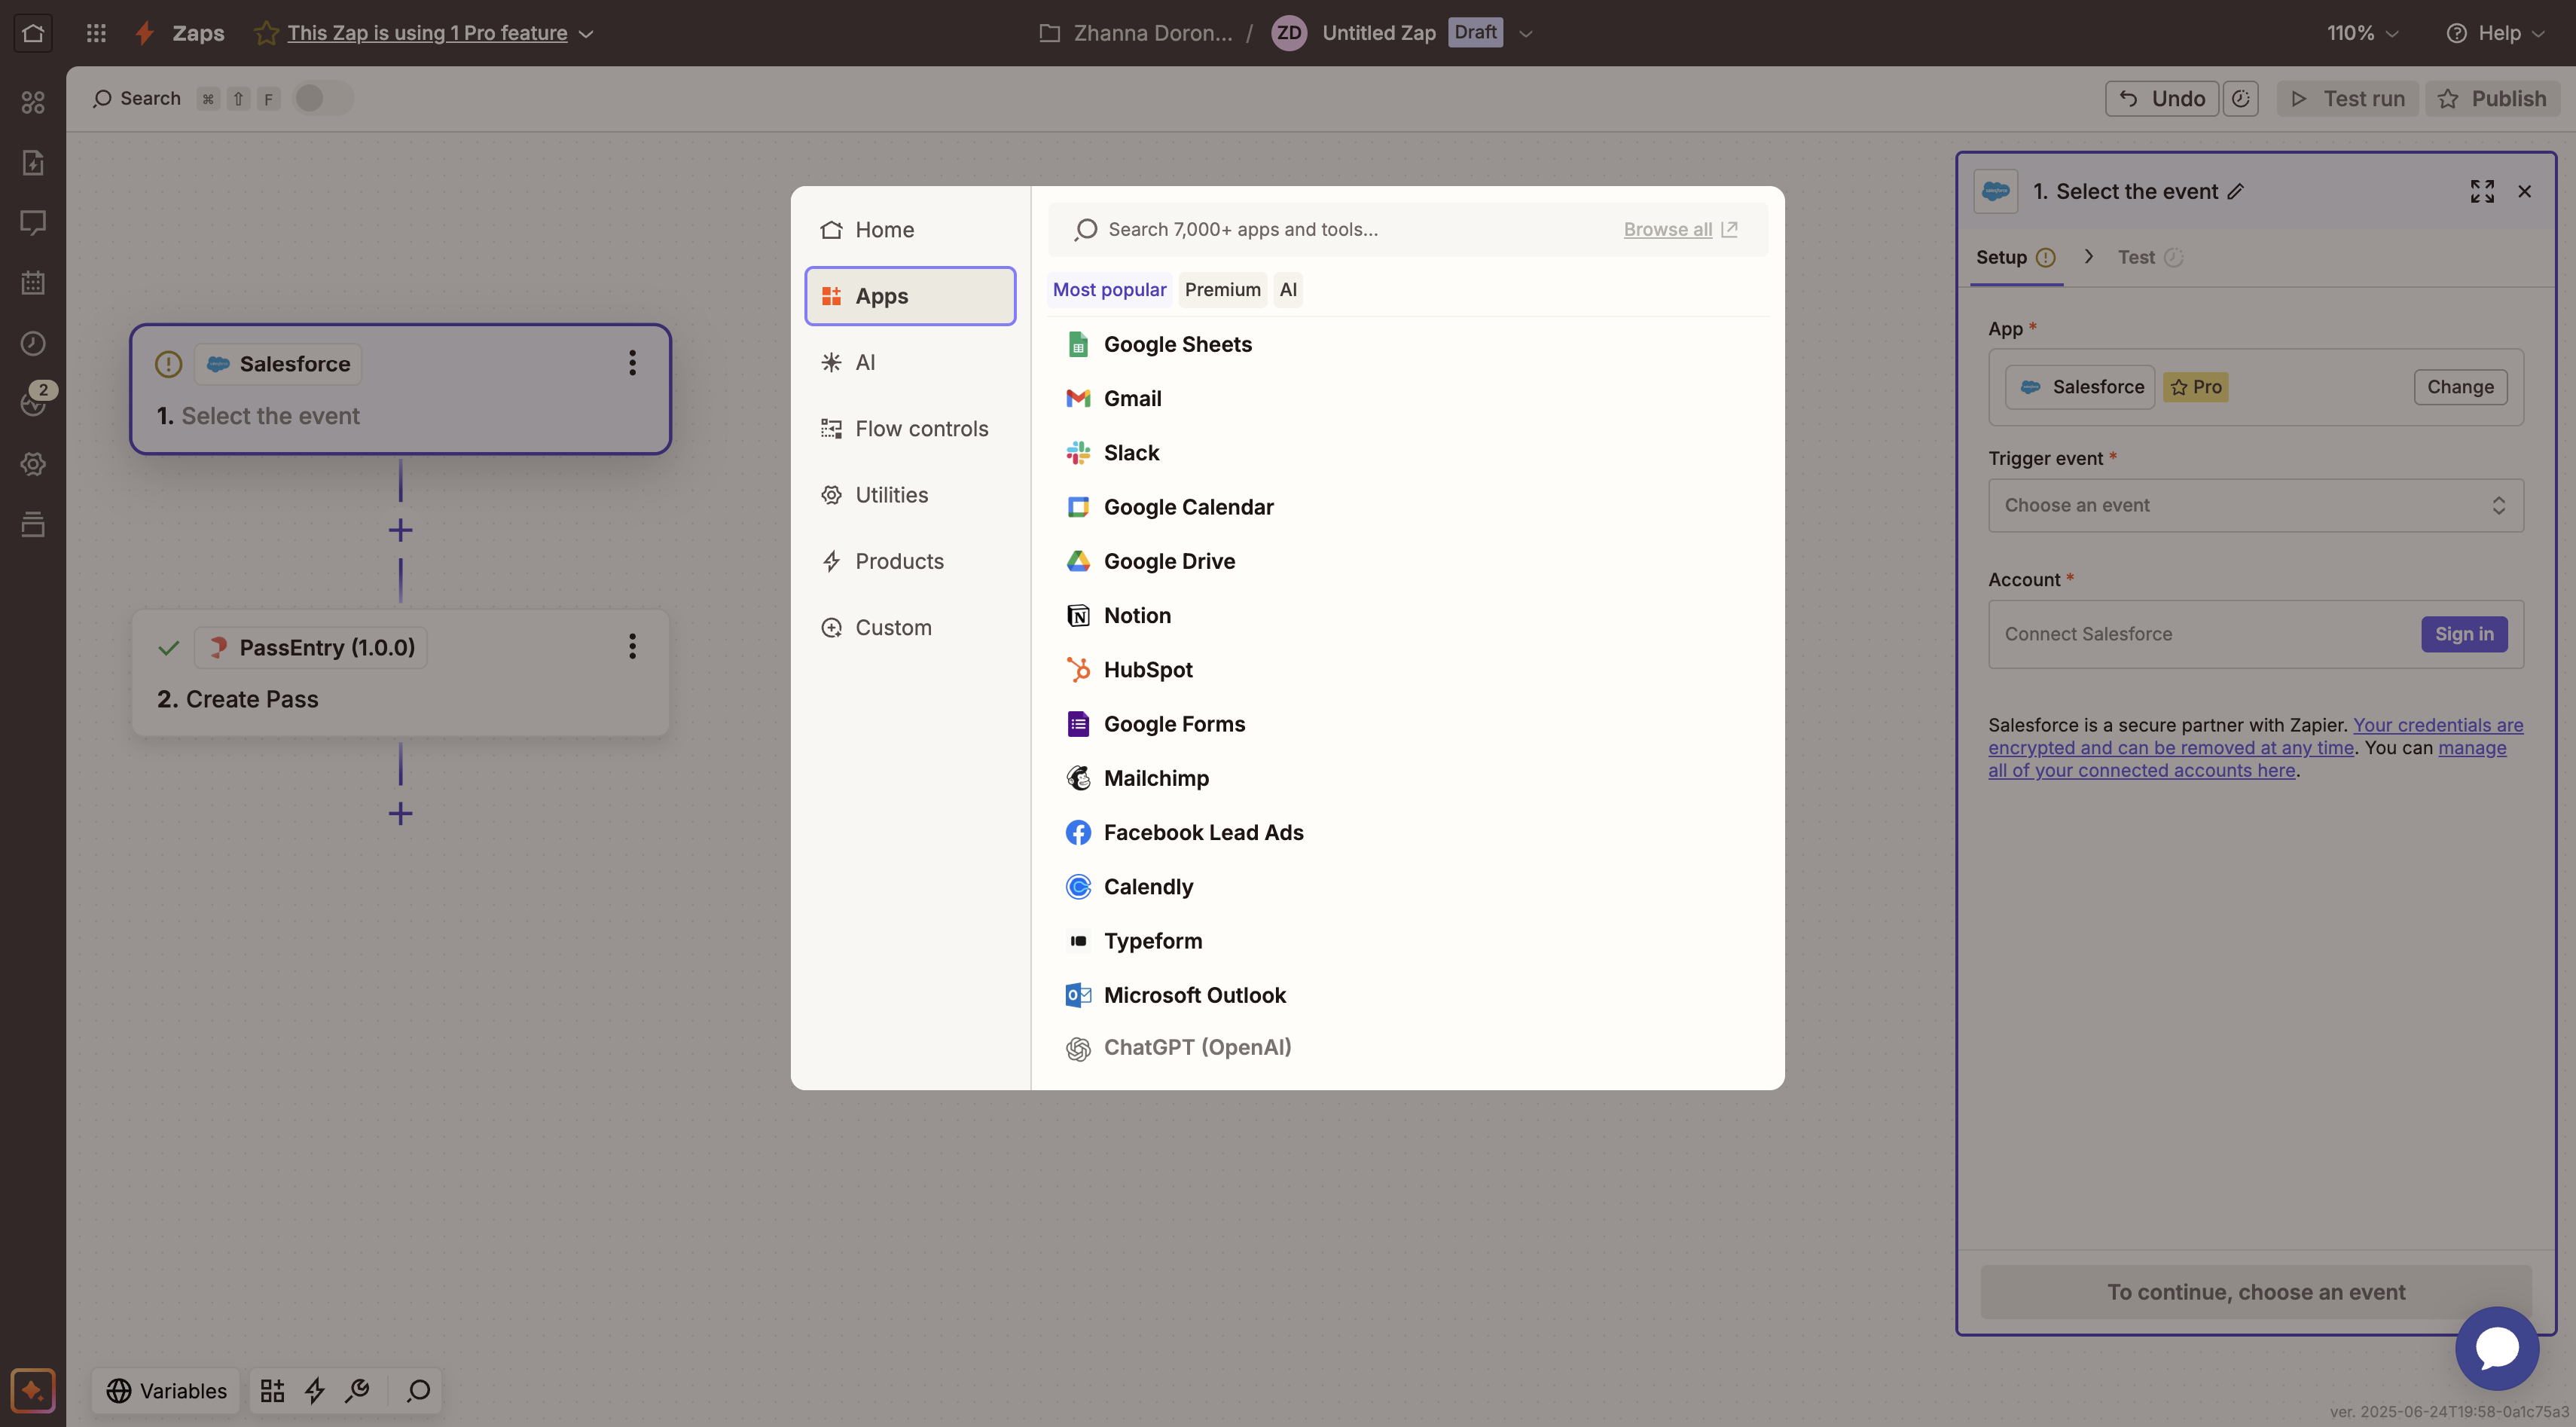
2. Create a New Zap
- Go to zapier.com and click Create Zap
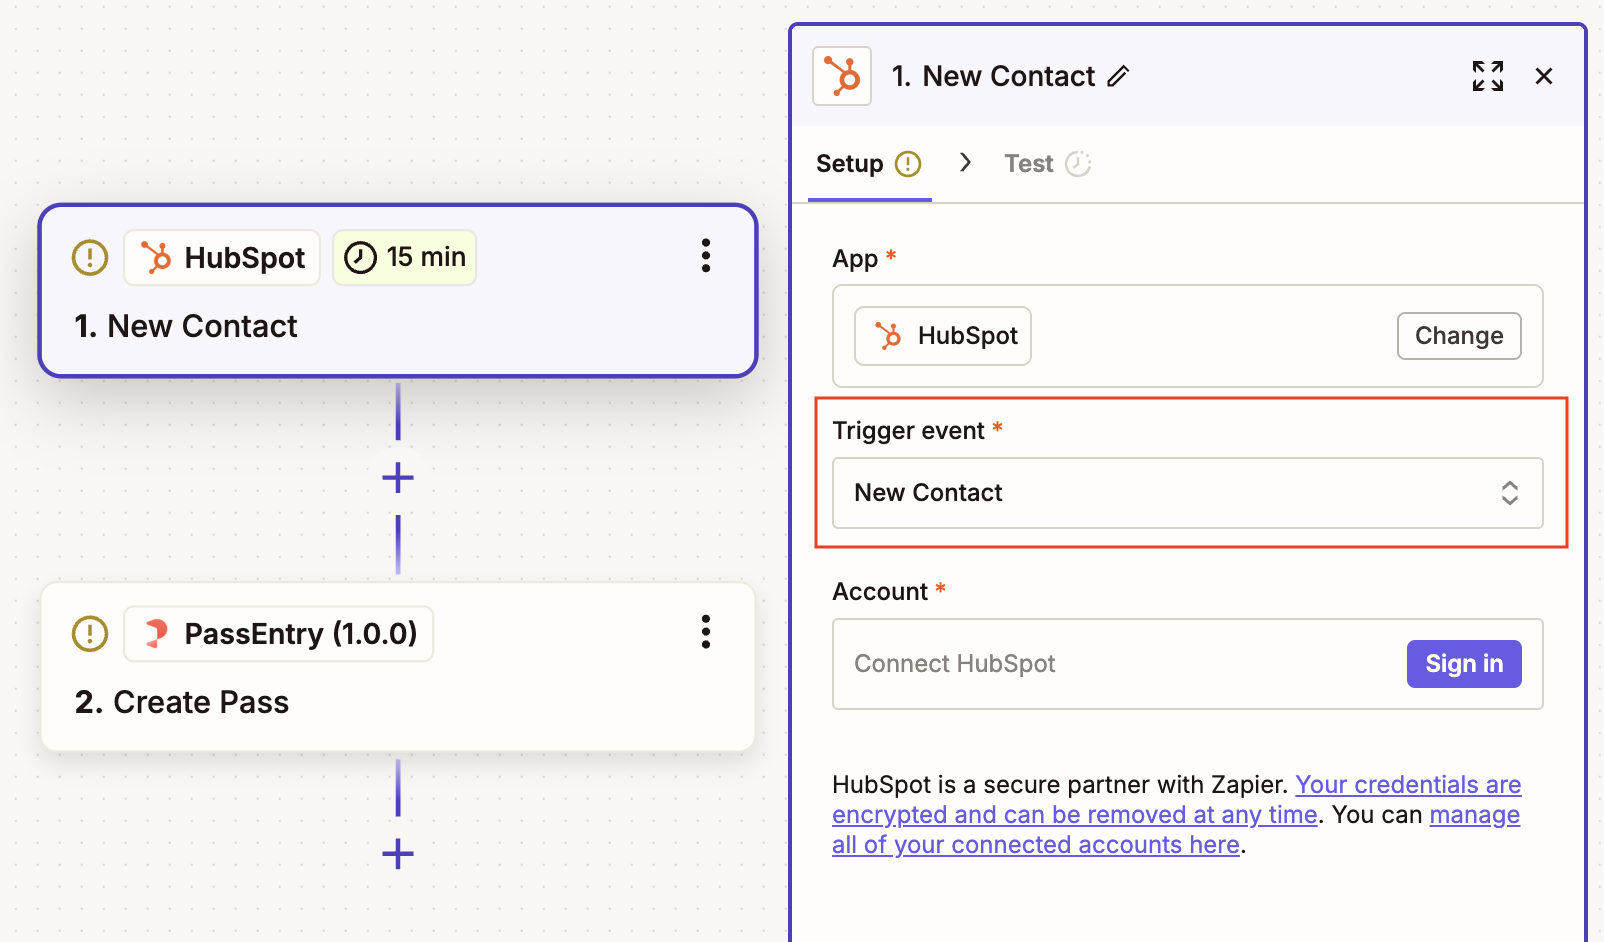
- Choose your trigger app (e.g. Salesforce, HubSpot, Google Sheets)
- Select a trigger event, such as New Contact, New Row, or Form Submission
3. Add the “Create Pass” Action
- Choose the Create Pass action from the PassEntry app
- Select the pass template you created in Step 1
- Zapier will automatically load dynamic fields based on your template
4. Map Your Fields
- Match data from your trigger app to PassEntry’s fields (e.g. first name, tier, expiration date)
- Most importantly, map the External ID to a unique ID in your system (CRM user ID, email, etc.)
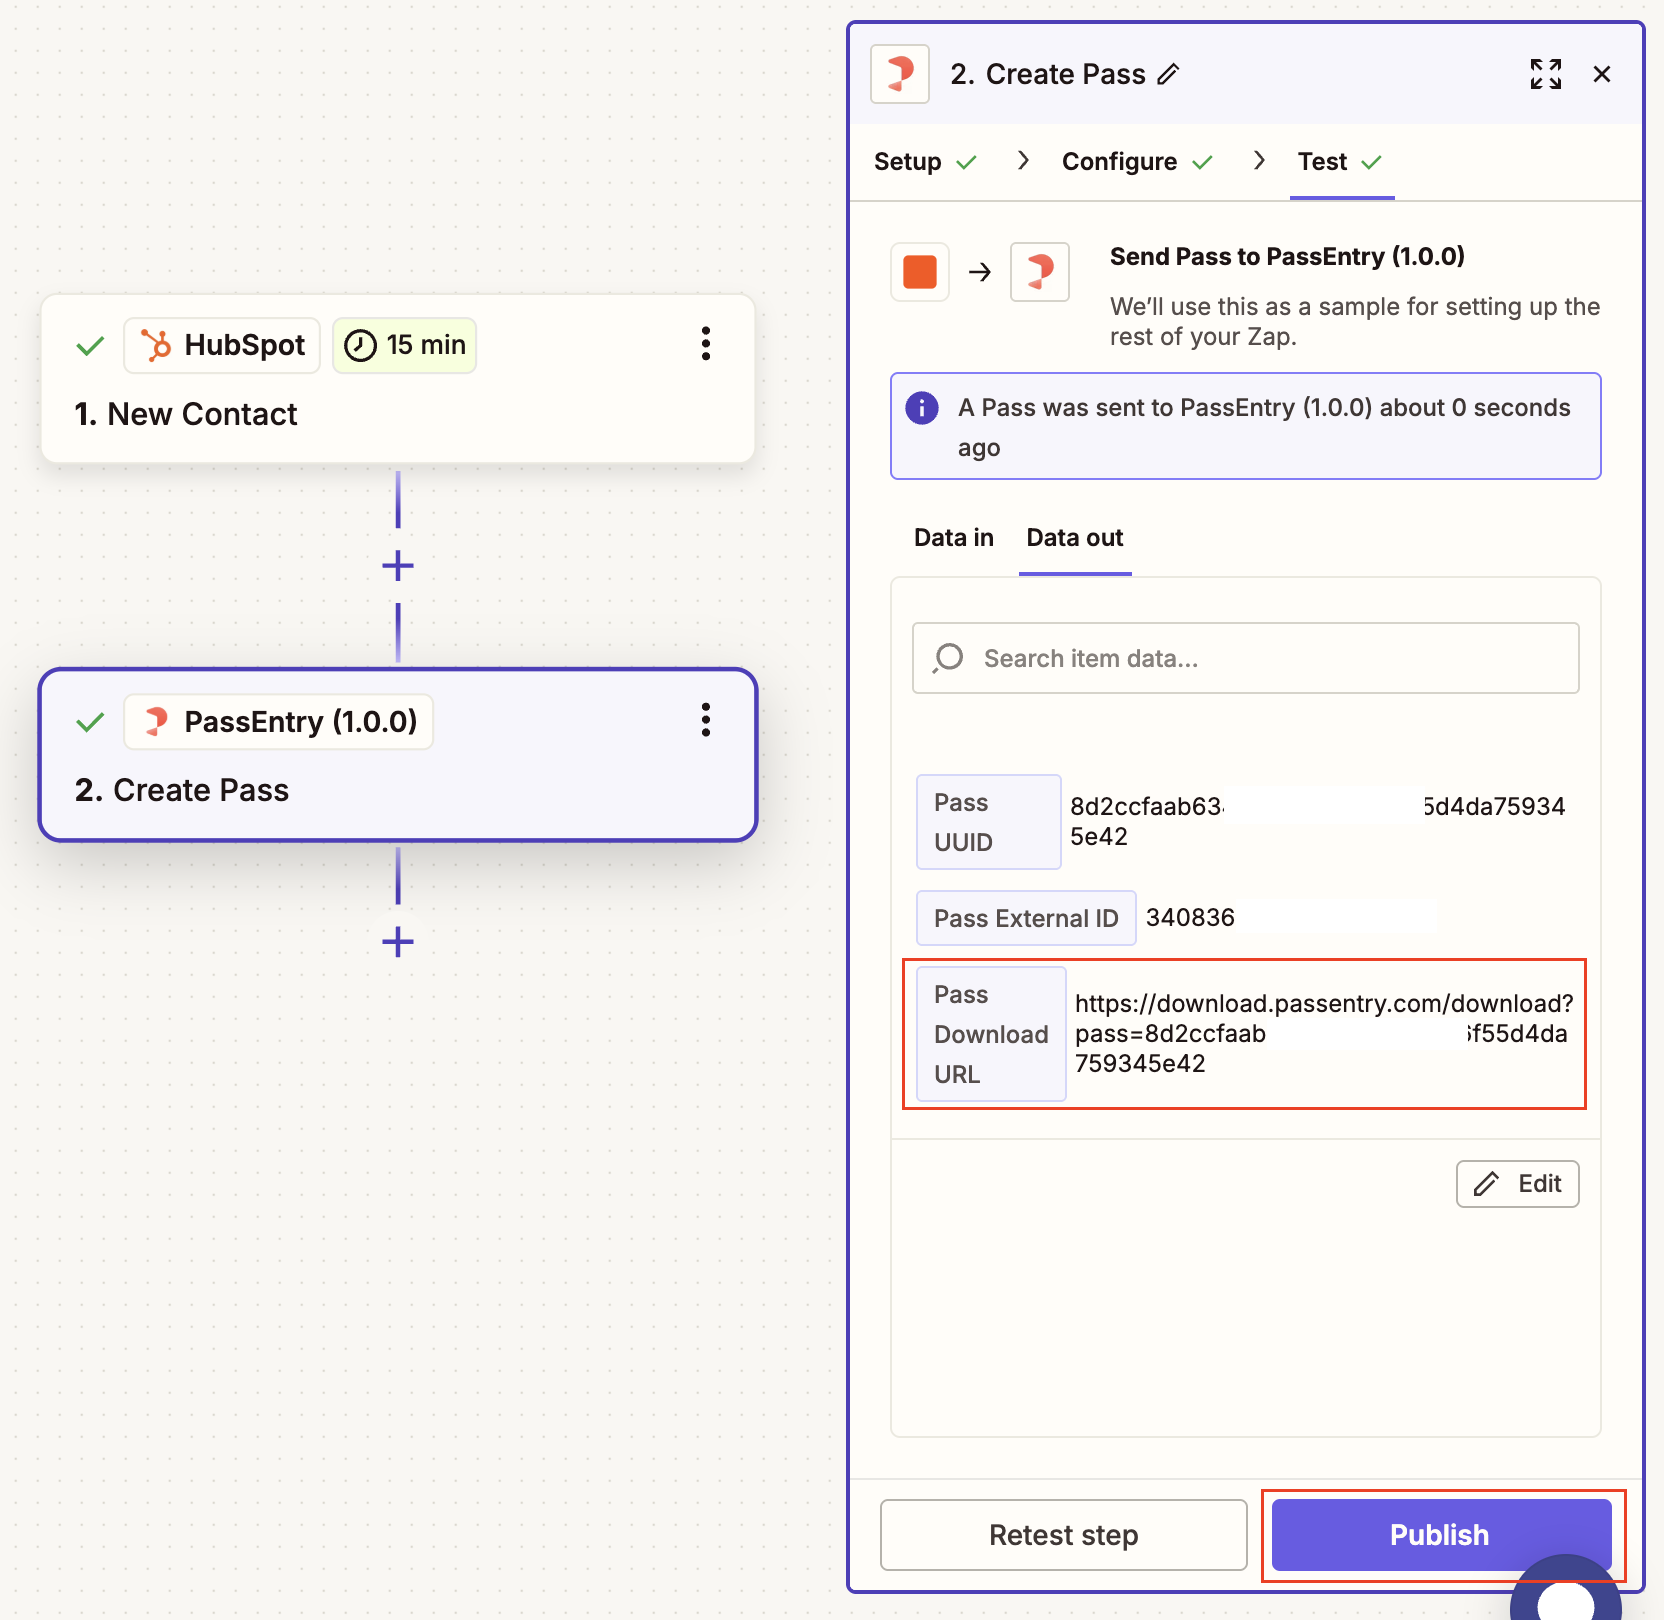
5. Test and Launch
- Use Test Step to preview a pass creation
- If successful, Zapier will return a download link
- Click Publish to activate the Zap
You can also build multi-step Zaps and use the returned download link to distribute the pass via SMS or email, or to update a CRM record. This allows you to fully automate your pass delivery process.
✅ Wrapping Up
You’re now ready to start building powerful automations with PassEntry and Zapier. We recommend starting with a simple use case – like issuing a pass when a new customer is created – and then gradually exploring more advanced flows like pass updates or reacting to real-time events.
We’ll continue adding more examples and case studies to help you get the most out of the integration.
If you have any questions or want help designing your first Zap, feel free to contact our support team – we’re here to help!