> ## Documentation Index
> Fetch the complete documentation index at: https://docs.passentry.com/llms.txt
> Use this file to discover all available pages before exploring further.
# Notifications
> Learn how to send wallet-native notifications to Apple Wallet and Google Wallet passes, including platform limits, best practices and how to include links and dynamic data in notifications.
**Wallet notifications** let you reach customers at the right moment – directly through their Apple Wallet or Google Wallet pass. Use notifications to share important updates like event changes, expiring memberships, or account activity without relying on email or SMS.
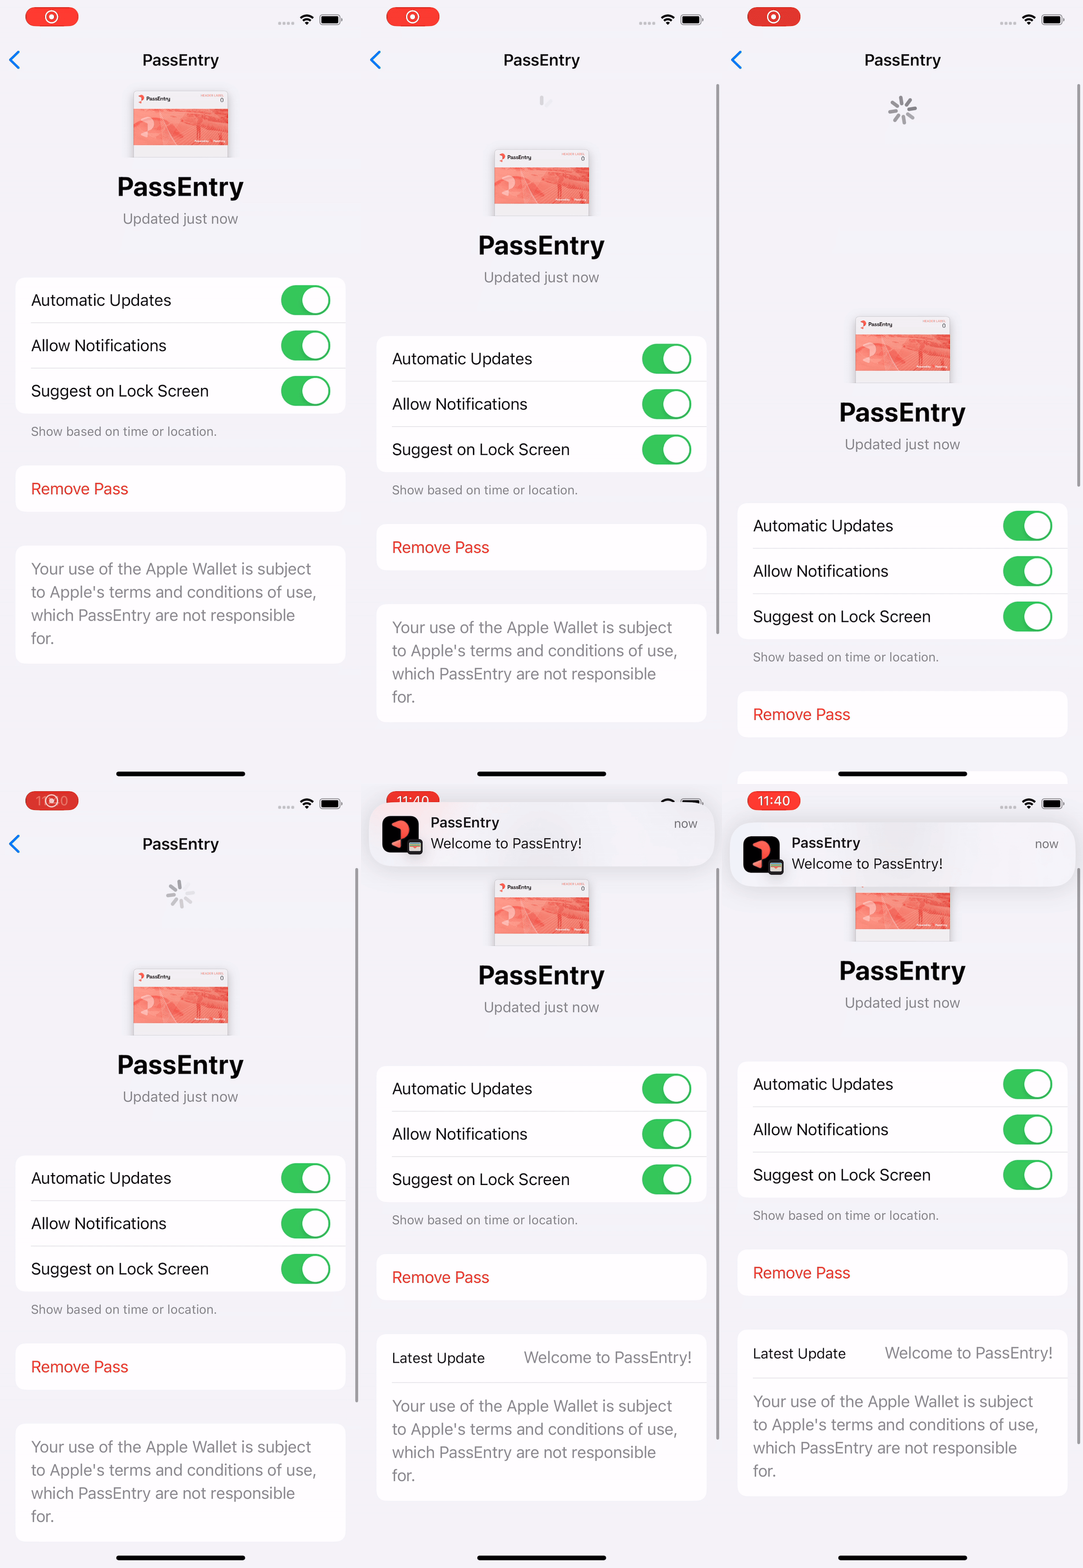
When a notification is sent, it appears on the device lock screen and is also stored on the back of the pass as the **Latest Update**, so users can always see the most recent message.
Wallet notifications are delivered on a **best-effort basis**. Neither Apple nor Google guarantee immediate or reliable delivery of lock screen notifications. Some delay between sending and delivery is expected. See [Troubleshooting](#troubleshooting) for platform-specific details.
### Best practices
Apple Wallet and Google Wallet apply **different limits and delivery behaviour** for notifications. Keep the following platform-specific constraints in mind when designing your notification strategy.
Currently limits their push notifications to **3 per day** per pass, if you go over this quota, the passholder will not receive a push notification on their lock screen, but it will update the "Latest Update" on the back of the pass.
Limits their push notifications to **10 per day** and may sometimes not show push notifications if sent within a very short interval (seconds between notifications)
***
As a general rule, we recommend limiting notifications to **no more than 3 per day per pass** to avoid rate limits and reduce notification fatigue.
### Sending Notifications
If sending notifications to an individual pass, use our [Send Notification](/api-reference/v1/passes/send-notification) endpoint.
If you wish to send notification alongside a pass update, you can do so using our [Update Pass](/api-reference/v1/passes/update-pass) or [Update loyalty balance](/api-reference/v1/loyalty/update-loyalty-balance) endpoints
### Including a link in the notification
When including a link in the notification, the link will be opened when the user taps the notification.
However, the format of a clickable link is different for each platform.
We offer a simple solution to generate a clickable link for both platforms.
Include a valid URL in your notification.
"Visit [https://www.passentry.com](https://www.passentry.com) for more!"
or "Visit passentry.com for more!"
In order to make the link clickable, the user must press and hold the notification until the link is highlighted.
Apple does not support HTML tags in notifications, but autodetects the link and makes it clickable.
Links must be formatted as HTML `` tags.
`Visit https://passentry.com for more!`
The text is the text that will be visible on the notification, and can be different from the URL text.
`Visit this link for more!`
***
**Using PassEntry's link generator**
As the device type is not always known, we offer a simple solution to generate a clickable link for both platforms.
To create a link, enclose the link text in brackets (e.g., \[this link]) and then follow it immediately with the URL in parentheses (e.g., ([https://passentry.com](https://passentry.com))).
`Visit [this link](https://passentry.com) for more!`
We will automatically generate the correct link for the platform.
Make sure to always send a test message to verify that the link is clickable and working as expected.
You must include the link text \[this link] in the notification, and the URL in parentheses (e.g., ([https://passentry.com](https://passentry.com))).
**The URL must always begin with http\:// or https\://**
Link text is ignored on Apple, but will appear on Google. It is always required, if you don't want to show any custom text, the link text should be the same as the URL text.
**Example:**
The following notification `Visit [this link](https://passentry.com) for more! ` will be displayed as:
*Apple:* Visit [https://passentry.com](https://passentry.com) for more!
*Google:* Visit this link for more!
### Dynamically inserting variables in the notification
You can also include variables in the notification using the `%{passData.variable_name}` syntax.
We currently support the following variables:
| Variable | Description |
| ------------------- | ----------------------------------------------------------------------------------------------- |
| `%{passData.uuid}` | The UUID of the pass |
| `%{passData.extId}` | The external ID of the pass - shown as an empty string if the pass does not have an external ID |
Example:
`Visit https://passentry.com/membership-tier/%{passData.extId} for more!`
Will be displayed as:
`Visit https://passentry.com/membership-tier/1234567890 for more!`
The variable will be replaced with the value of the variable when the notification is sent.
## Troubleshooting
### Apple
If you are having issues receiving push notifications on your iOS device, please check the following:
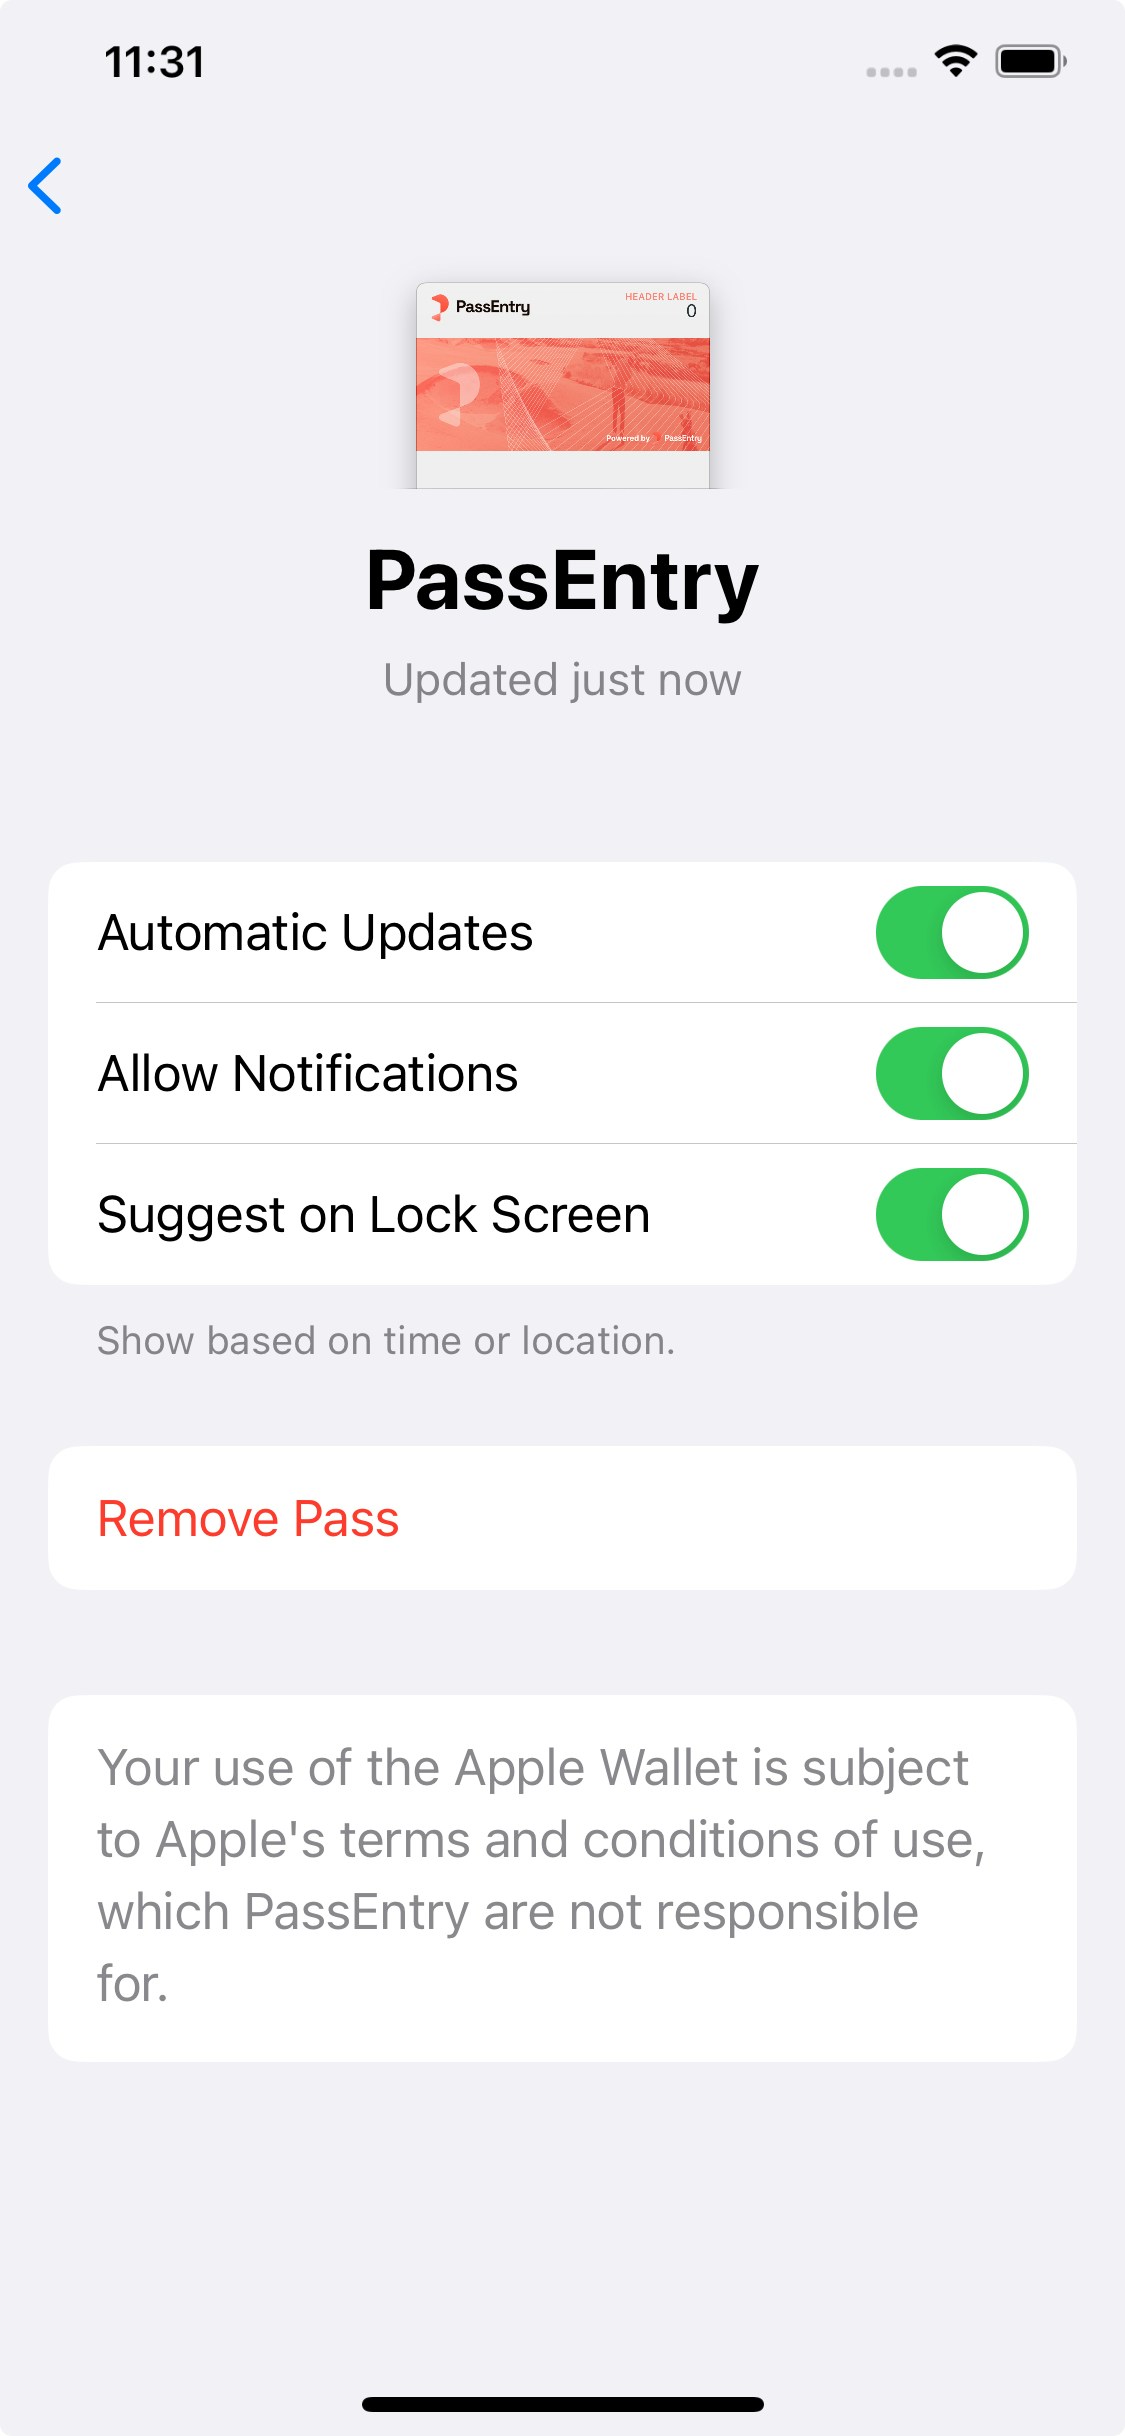
* Ensure that you have enabled push notifications for the specific pass by toggling `Automatic Updates` and `Allow Notifications`. These options are enabled by default on the Wallet.
 * Notifications are usually displayed in real time, however, when sending a large number of notifications to a single pass, Apple will sometimes rate limit the notifications, which will result in the notification delivery being delayed.
Although quite common during development or testing, this will not typically happen in live environments, as most passes will not usually be sending more than 10 notifications per day.
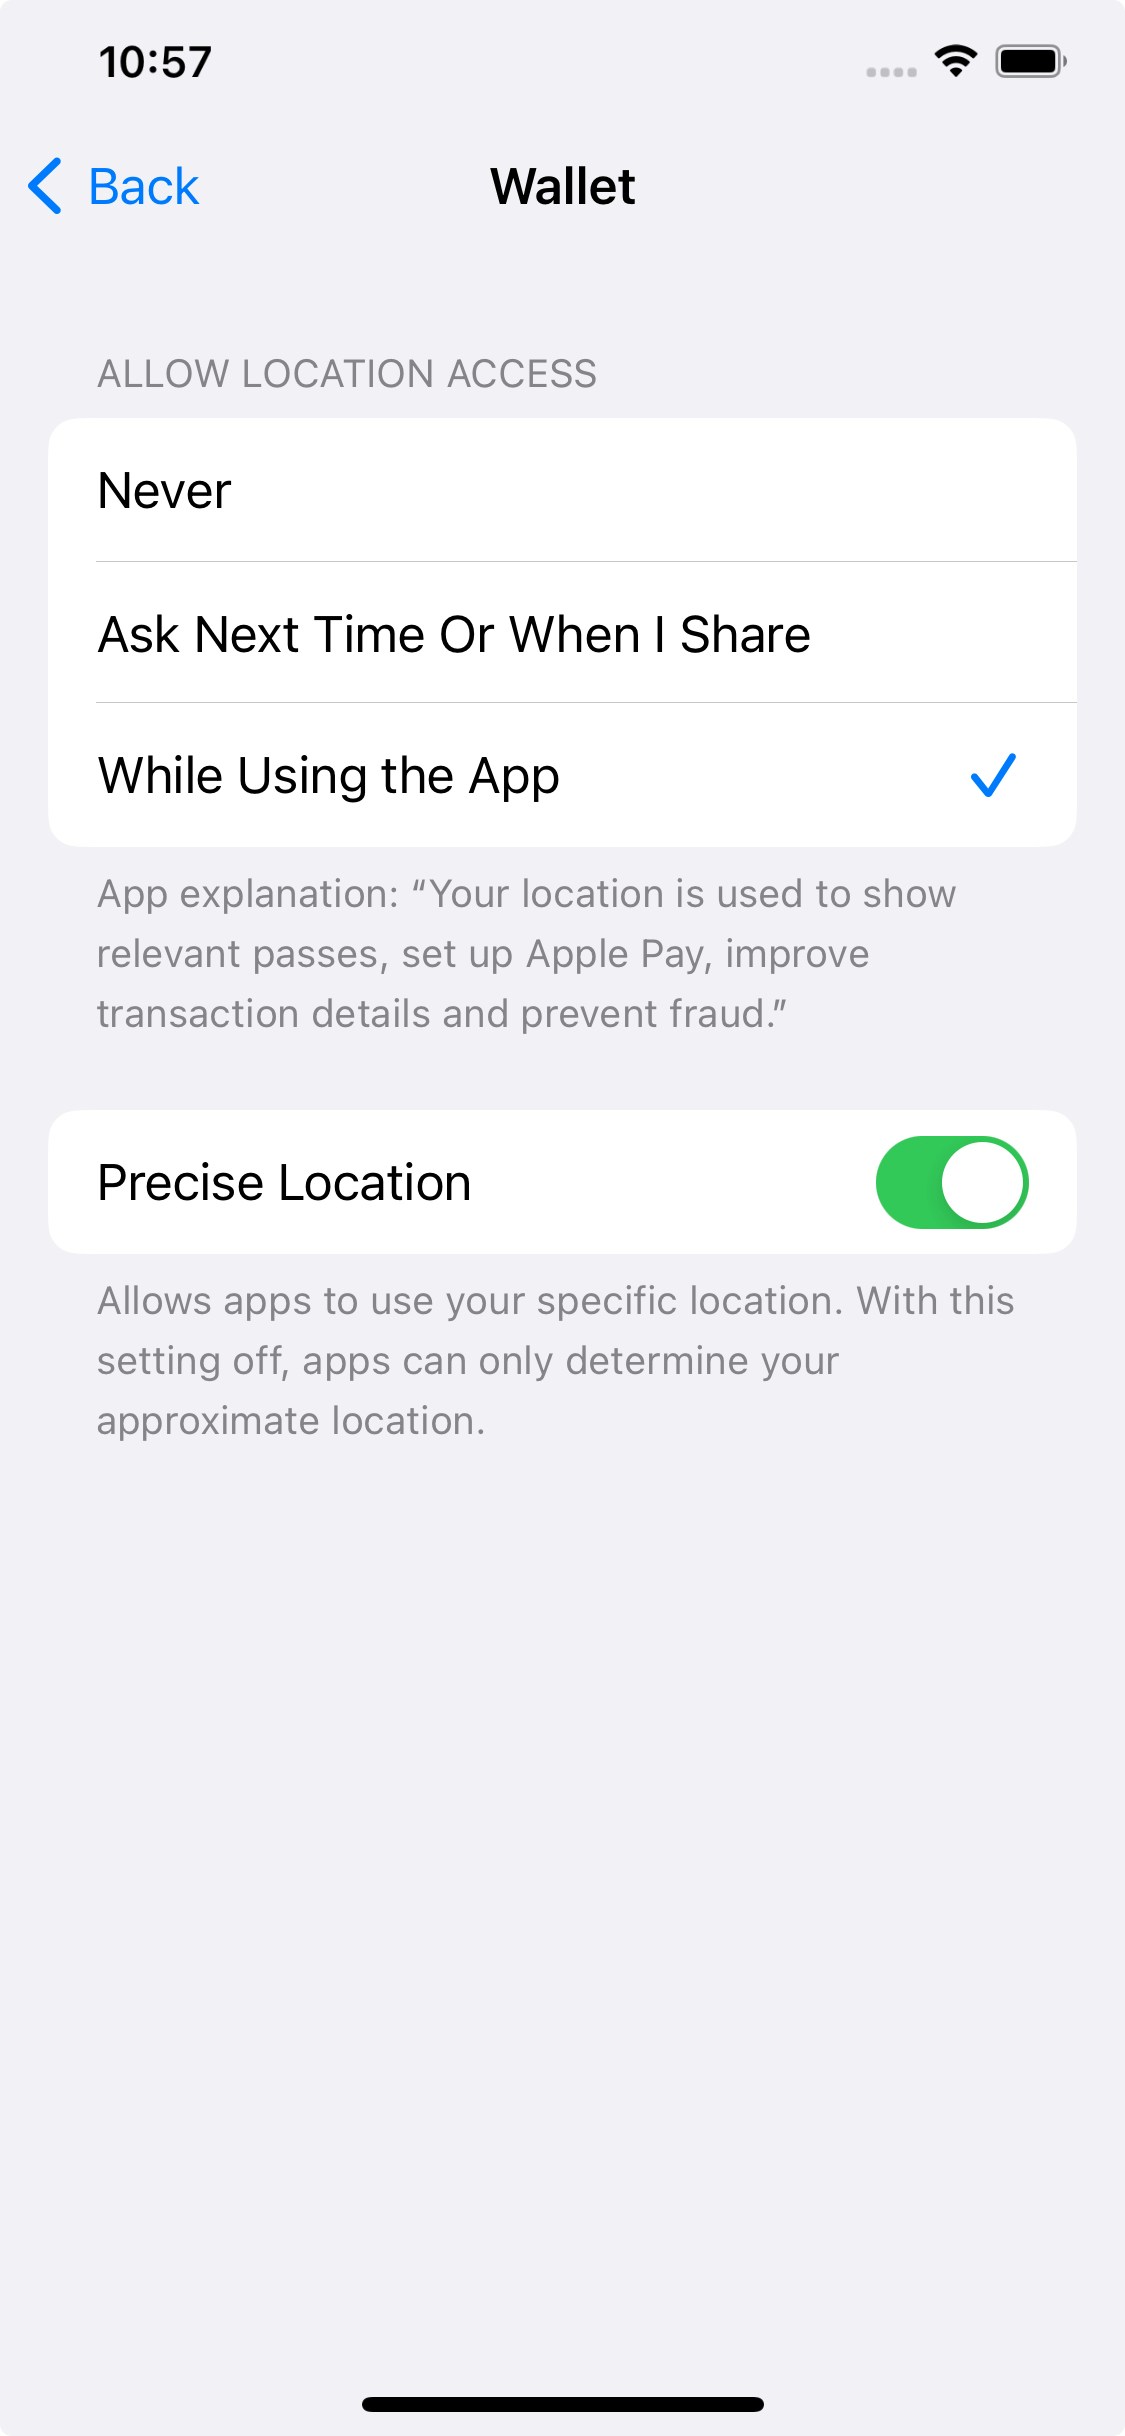
* For geofence notifications, please ensure that Location Services are enabled for the Apple Wallet.
`Settings -> Privacy & Security -> Location Services -> Wallet`
* Notifications are usually displayed in real time, however, when sending a large number of notifications to a single pass, Apple will sometimes rate limit the notifications, which will result in the notification delivery being delayed.
Although quite common during development or testing, this will not typically happen in live environments, as most passes will not usually be sending more than 10 notifications per day.
* For geofence notifications, please ensure that Location Services are enabled for the Apple Wallet.
`Settings -> Privacy & Security -> Location Services -> Wallet`
 * To force an update to the pass, you can drag and pull down on the pass from the back of the pass. This will force any new notifications to be displayed, regardless of notification permissions or rate limits.
 ### Google
If you are having issues receiving push notifications on your Android device, please check the following:
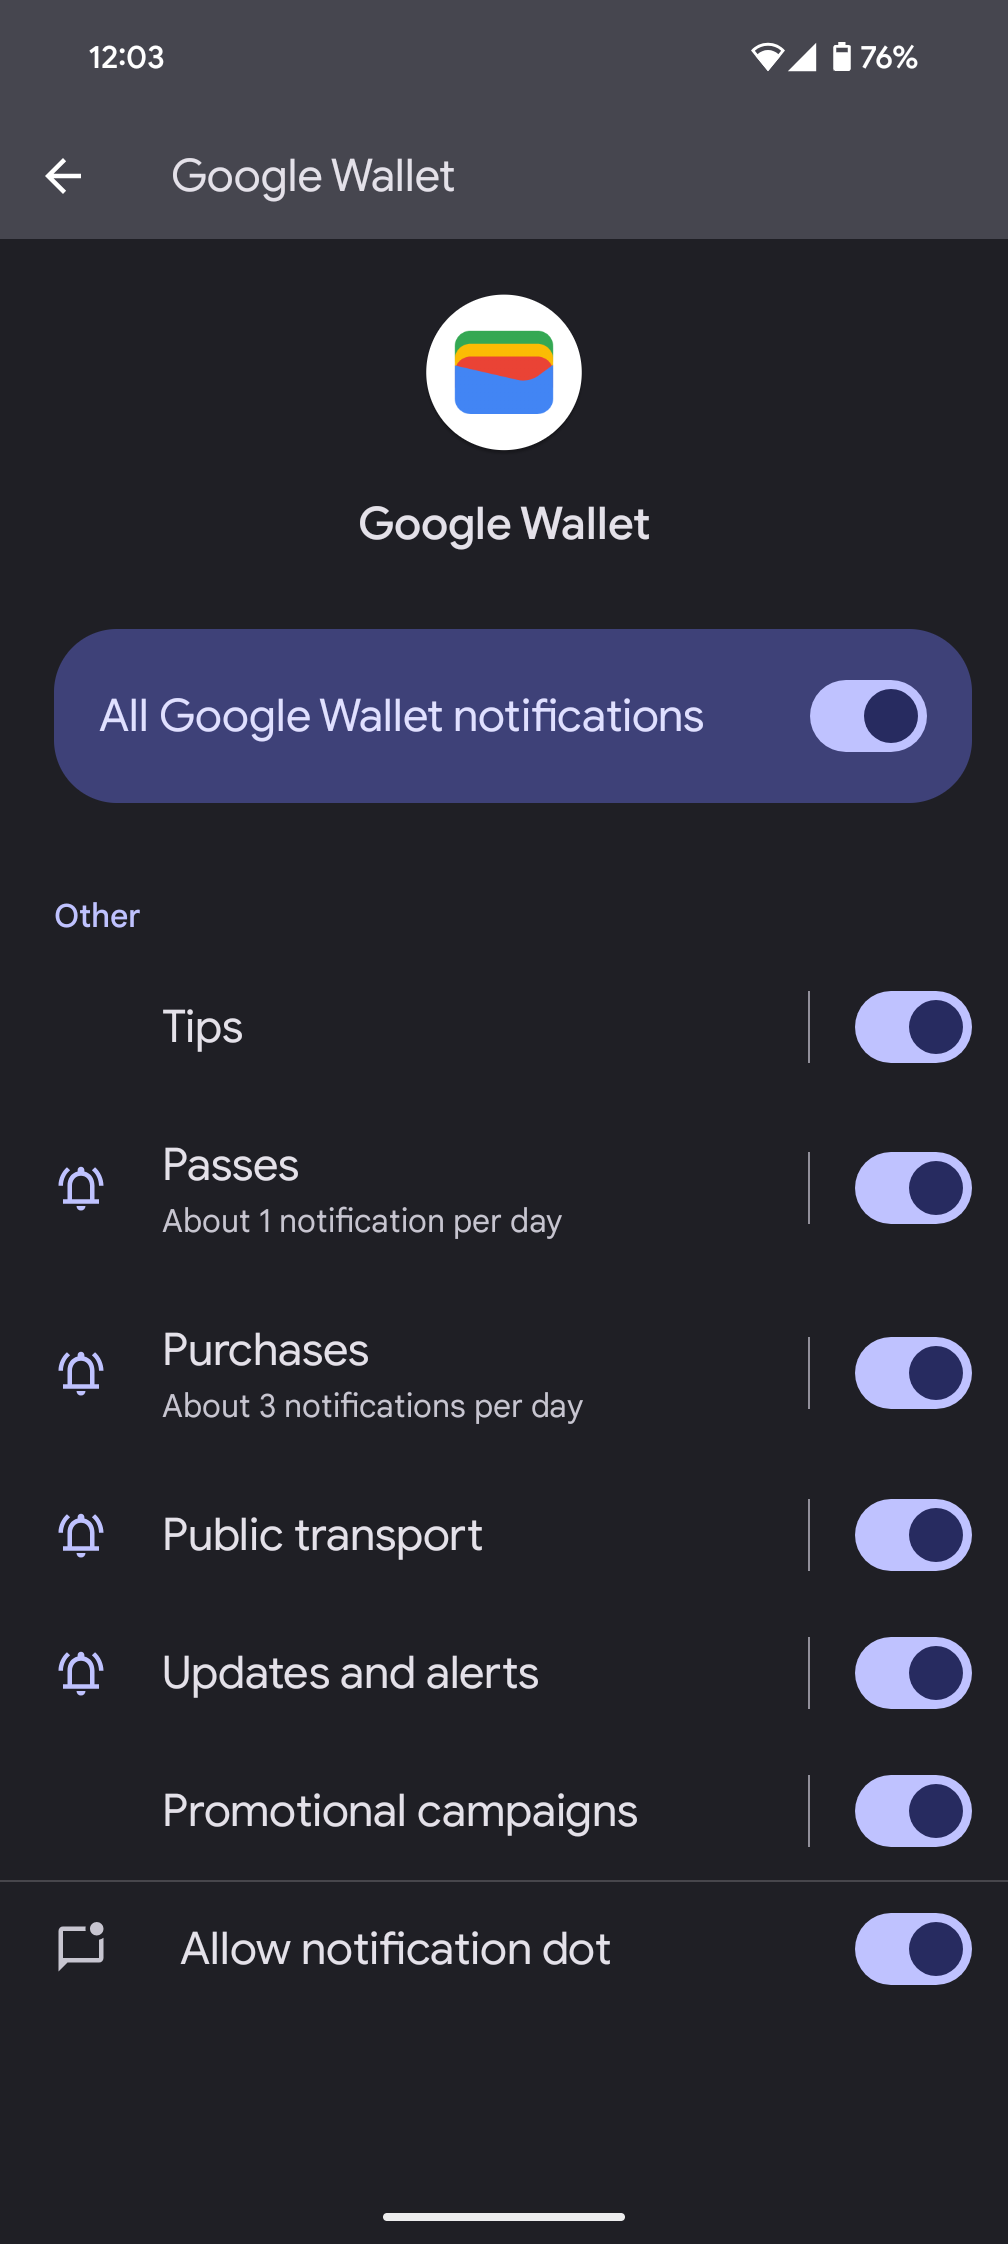
* Ensure notification permissions are enabled for the Google Wallet. This is enabled by default.
### Google
If you are having issues receiving push notifications on your Android device, please check the following:
* Ensure notification permissions are enabled for the Google Wallet. This is enabled by default.
 * Google wallet notifications are not displayed in real time, as the Google Wallet has a less frequent update cycle than Apple Wallet. It usually takes between 10 seconds and 2 minutes for it to show up as a lock screen notification.
To force an update, you can close and reopen the Google Wallet app.
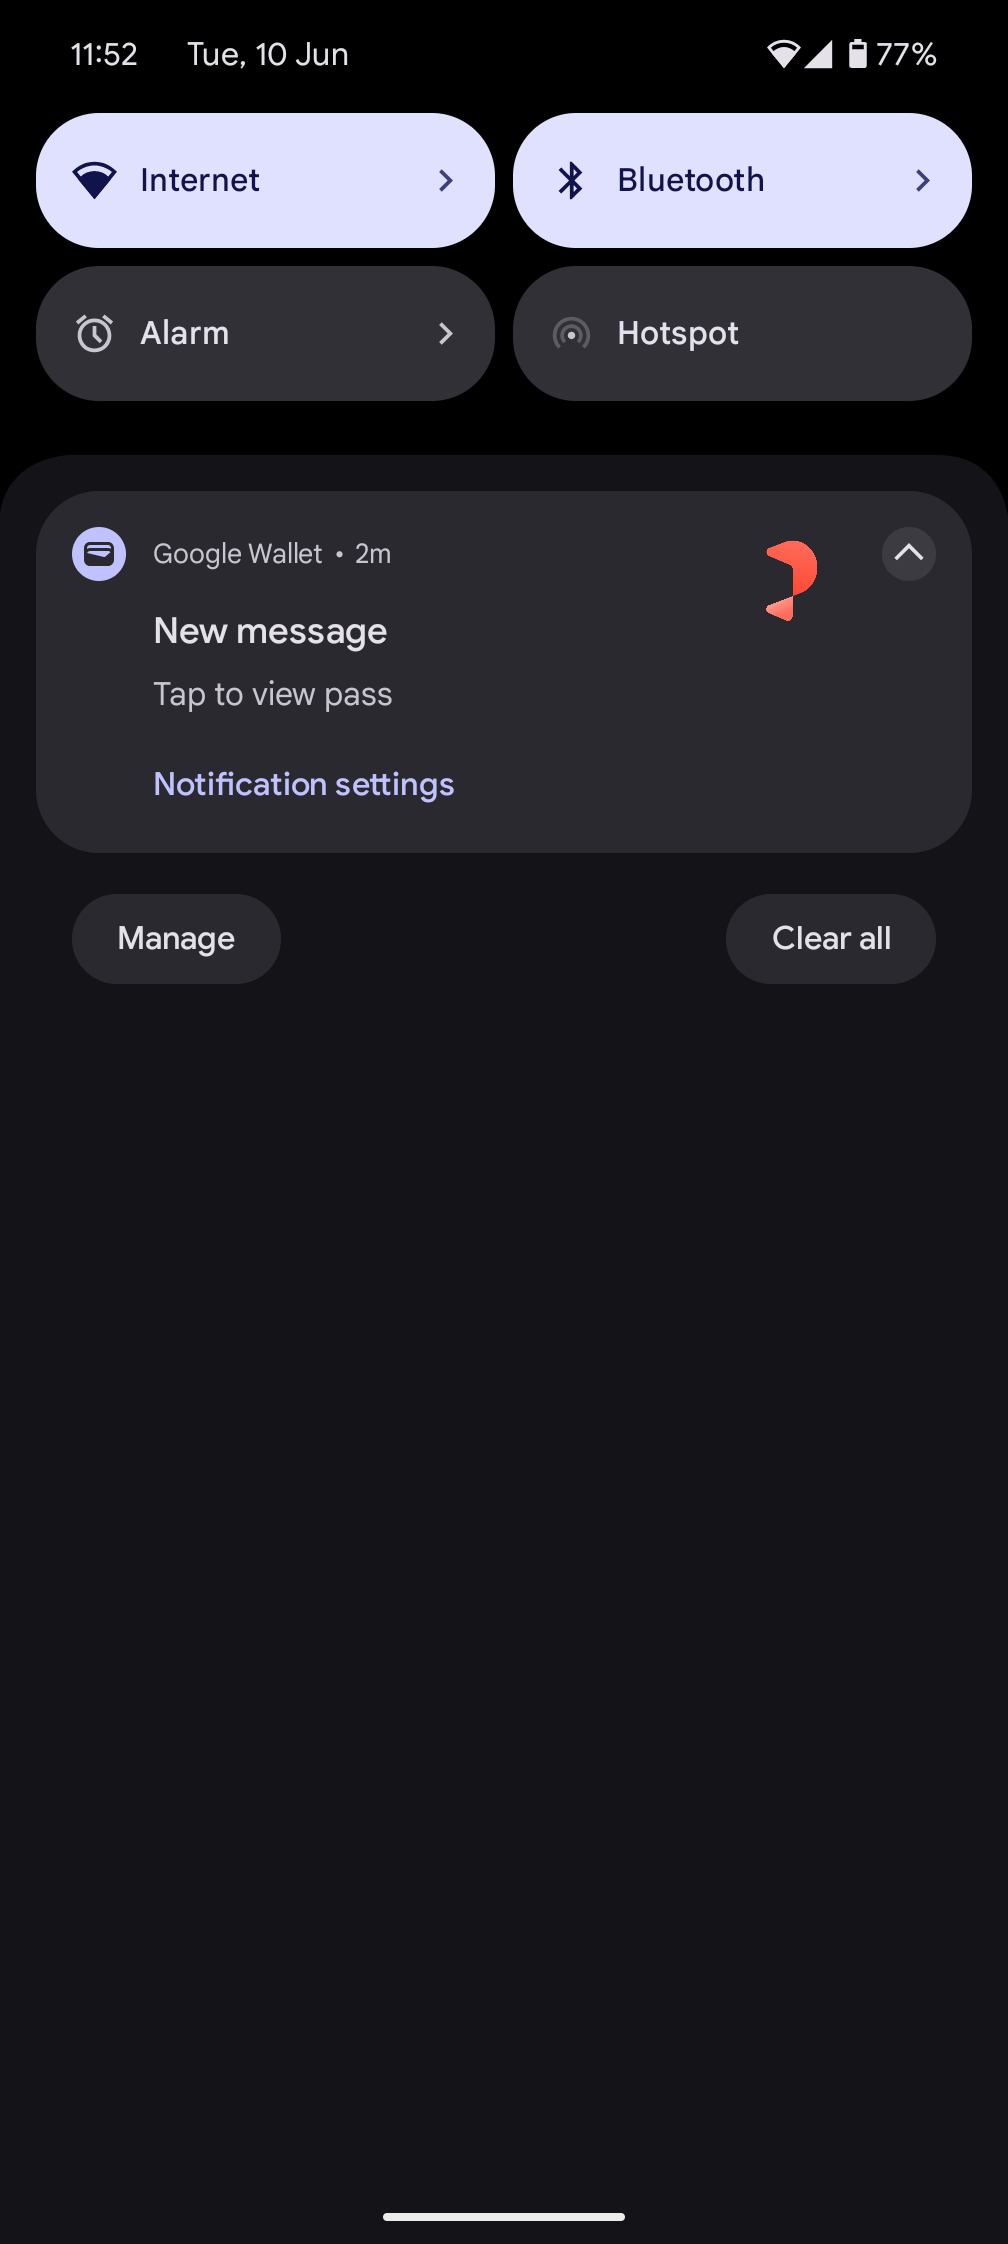
* Google does not include the link text in the notification, it instead displays a generic "New Message" text, alongside the pass template logo icon.
* Google wallet notifications are not displayed in real time, as the Google Wallet has a less frequent update cycle than Apple Wallet. It usually takes between 10 seconds and 2 minutes for it to show up as a lock screen notification.
To force an update, you can close and reopen the Google Wallet app.
* Google does not include the link text in the notification, it instead displays a generic "New Message" text, alongside the pass template logo icon.
 * Google rate limits notifications to 3 per day per pass, if you go over this quota, the passholder will not receive a push notification on their lock screen, but it will display an "Important Message" update from within the wallet, as well as updating the `Latest Update` field on the pass.
* If you're still unable to receive Google Wallet notifications, your Google Wallet may be set to a different Google account than the one with the pass that you are trying to send notifications to.
This is common for individuals with multiple emails on their device, such as work and personal accounts.
To switch accounts you can tap the profile icon in the top right corner of the Google Wallet app, or swipe through the account icons vertically to switch between them.
* Google rate limits notifications to 3 per day per pass, if you go over this quota, the passholder will not receive a push notification on their lock screen, but it will display an "Important Message" update from within the wallet, as well as updating the `Latest Update` field on the pass.
* If you're still unable to receive Google Wallet notifications, your Google Wallet may be set to a different Google account than the one with the pass that you are trying to send notifications to.
This is common for individuals with multiple emails on their device, such as work and personal accounts.
To switch accounts you can tap the profile icon in the top right corner of the Google Wallet app, or swipe through the account icons vertically to switch between them.