> ## Documentation Index
> Fetch the complete documentation index at: https://docs.passentry.com/llms.txt
> Use this file to discover all available pages before exploring further.
# VTAP Automatic Reader Setup
> Learn how to automatically configure VTAP NFC readers from the PassEntry Dashboard without using a VTAP Cloud account, including network setup and activation steps.
VTAP readers can be automatically configured from the PassEntry Dashboard in a few minutes, with PassEntry handling VTAP Cloud configuration on your behalf.
***
## Step-by-Step Instructions
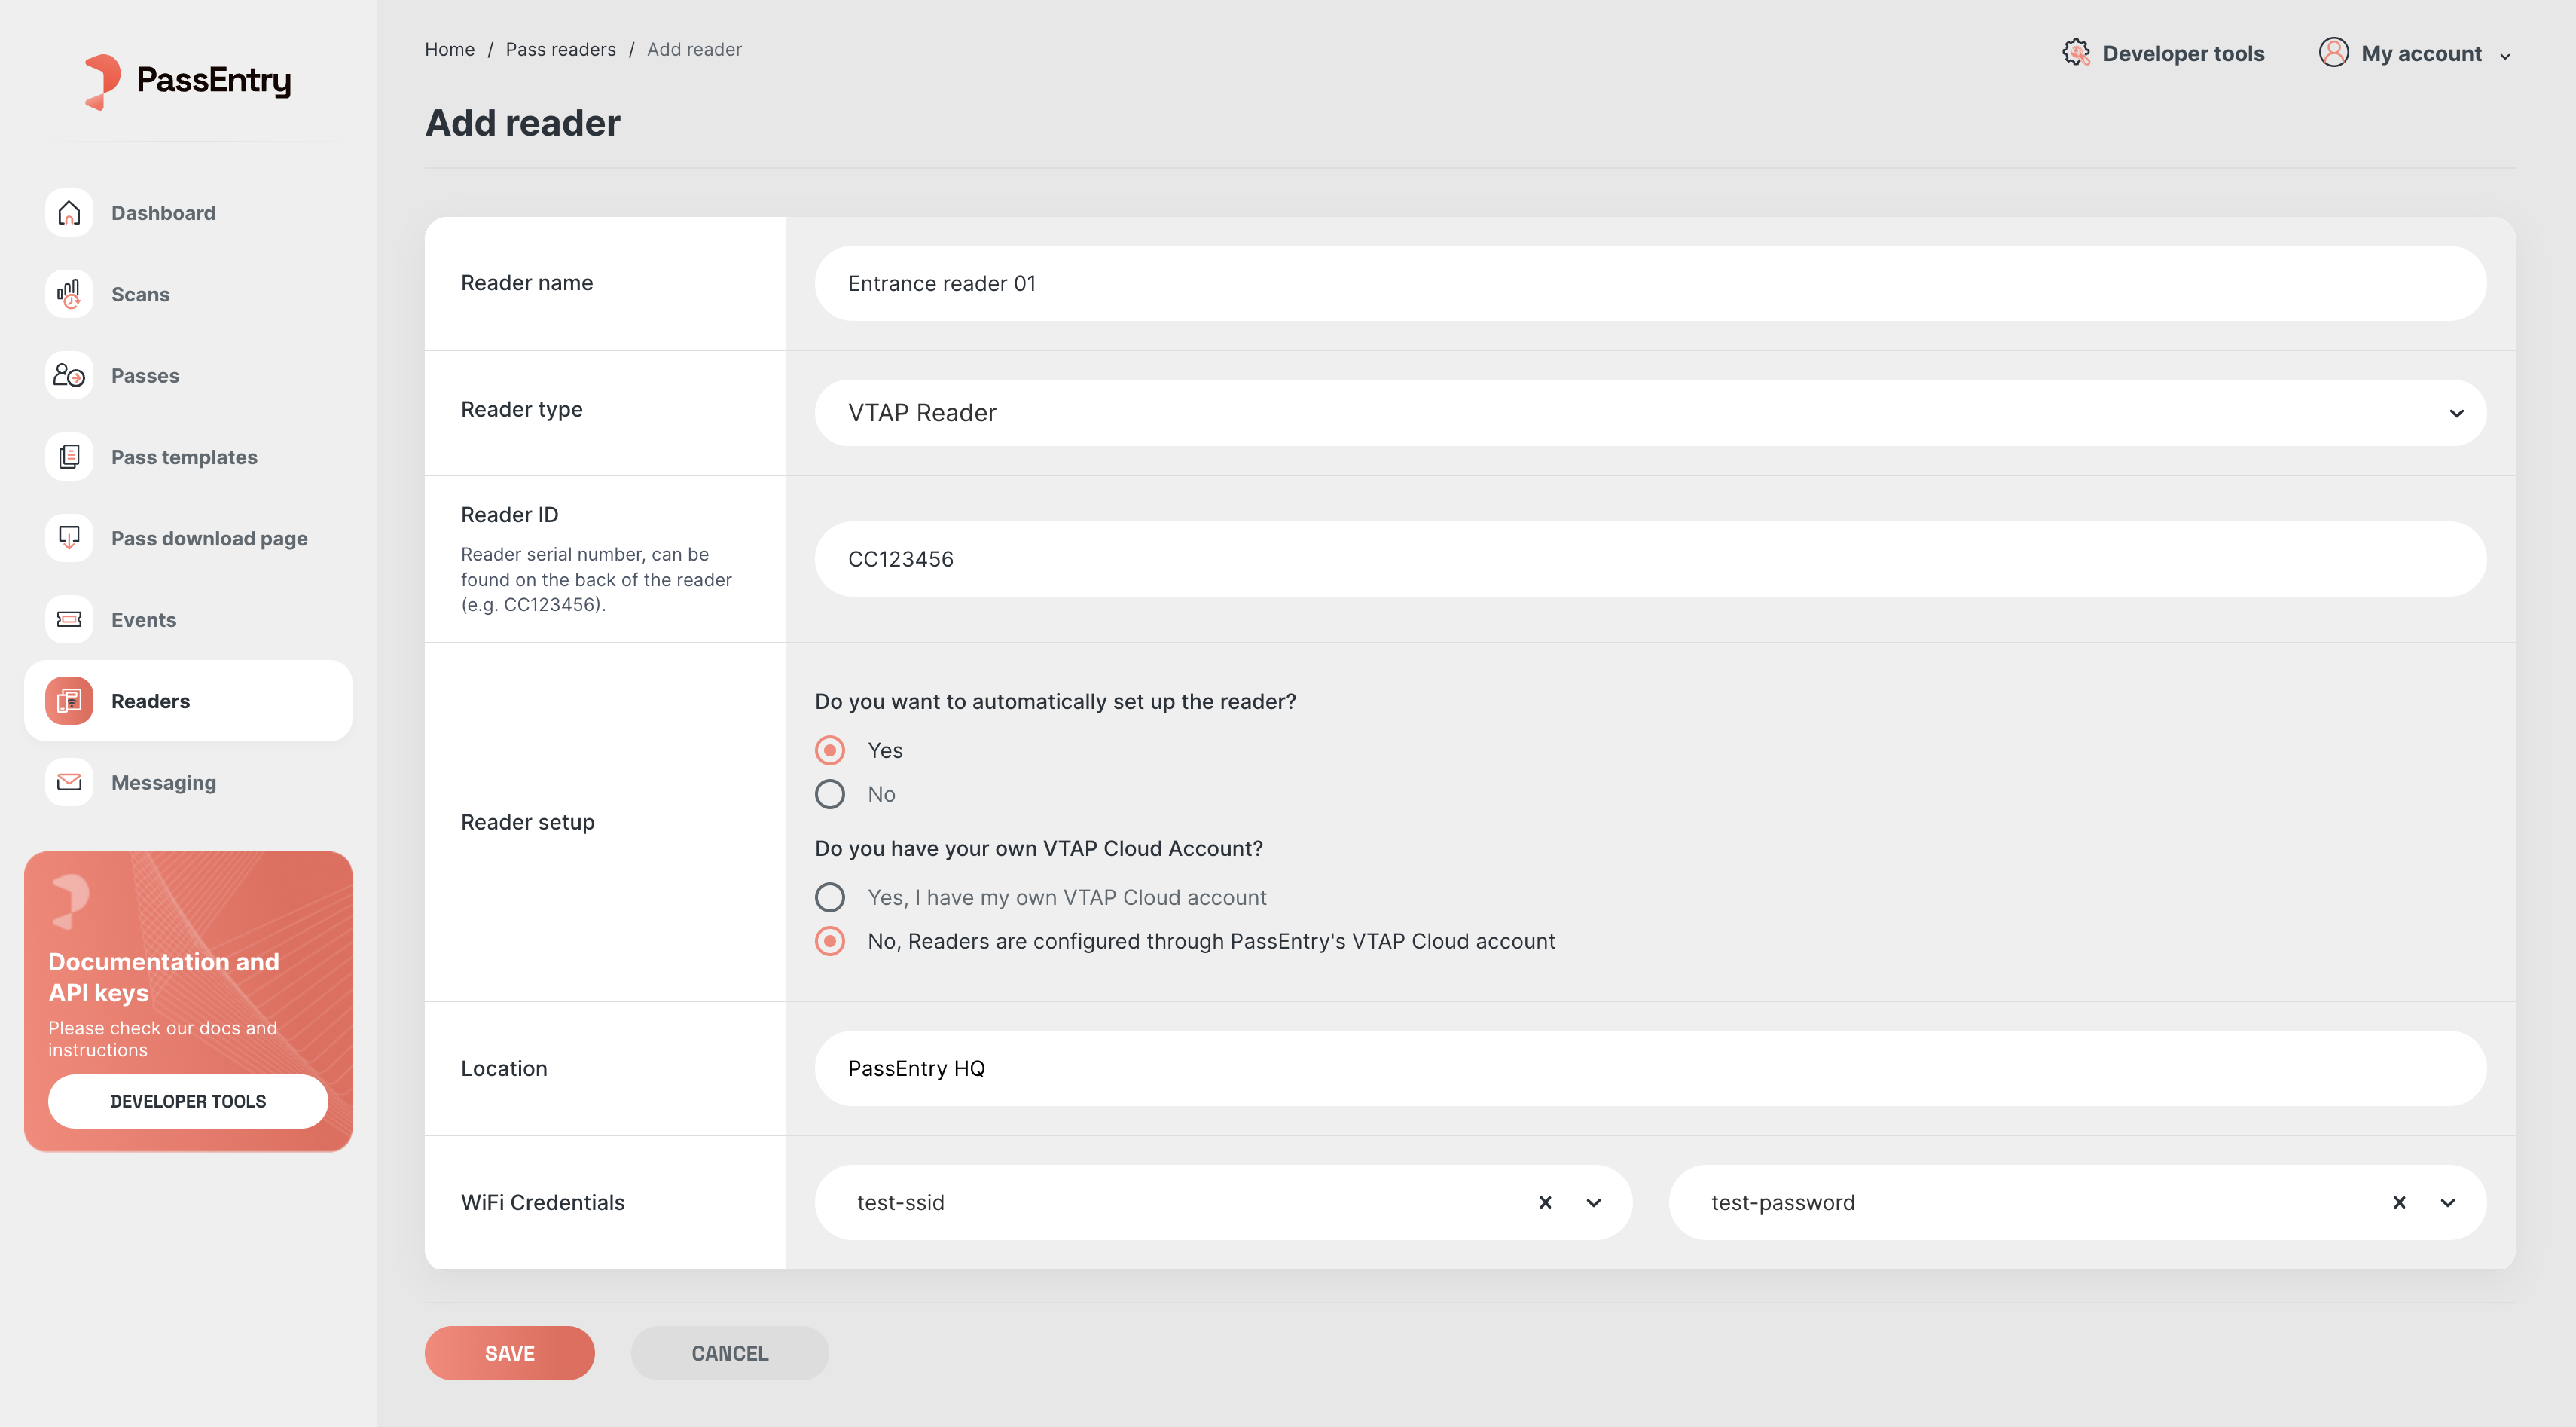 1. [**Navigate to Readers**](https://app.passentry.com/readers) in the PassEntry Dashboard and click **Add reader**.
2. **Fill in Reader Information**
* **Reader name**: Choose a name to identify the reader (e.g., `Entrance reader 01`).
* **Reader type**: Select **VTAP Reader** from the dropdown.
* **Reader ID**: Enter the reader’s serial number (printed on the back of the device, e.g., `CC123456`).
3. **Select Reader Setup Options**
* For automatic configuration, choose **Yes** under *Do you want to automatically set up the reader?*
* Under *Do you have your own VTAP Cloud Account?*, select:
* **No** if using PassEntry’s VTAP Cloud account, or
* **Yes** if you bought your readers independently and they are managed through your VTAP Cloud account.
* **VTAP Cloud Account**: If using your own VTAP Cloud account, enter the API key (please [contact VTAP support](mailto:vtap.support@dotorigin.com) to get the API key).
4. **Set Location and Network**
* **Location**: Provide a label for where the reader is physically located (e.g., `PassEntry HQ`).
* **WiFi Credentials**: Enter the network SSID and password to connect the reader to WiFi.
5. **Save Configuration**. The reader will be automatically configured using the information provided.
To receive the updated configuration, the reader must be online. Follow these steps to ensure a proper connection:
1. Plug the reader into a laptop or power supply.
2. Wait for the LED to change from flashing red to flashing blue (3 minutes). Flashing blue indicates the reader couldn’t connect to the internet and is now in hotspot mode.
3. On your laptop, open the list of available Wi-Fi networks and select the **reader's serial number**, use WPA-PSK security and **password 'passreader'** to connect.
4. After that you should get redirected to a webpage called ‘Sign in to READER\_SERIAL’. If this does not happen automatically, open a web browser, on the phone or laptop on the 'READER\_SERIAL Setup' network, and go to [http://192.168.4.1](http://192.168.4.1)
5. Follow the on-screen instructions to manually add a temporary Wi-Fi connection.
6. Once connected, the reader will receive the configuration and the LED will switch to a steady blue light.
This confirms the reader is online and has successfully received the updated configuration.
***
## After Setup
Once the reader is set up, you’ll see a **“Completed”** status in the Dashboard.
If the setup fails for any reason, please contact [PassEntry Support](mailto:support@passentry.com) — we’ll assist you with troubleshooting.
After setup, you can manage the following directly from the PassEntry Dashboard:
* Edit the reader's name and location
* Update WiFi credentials
* Adjust [validation settings](https://app.passentry.com/readers/reader-configuration)
All configuration changes are automatically synced with the VTAP reader.
1. [**Navigate to Readers**](https://app.passentry.com/readers) in the PassEntry Dashboard and click **Add reader**.
2. **Fill in Reader Information**
* **Reader name**: Choose a name to identify the reader (e.g., `Entrance reader 01`).
* **Reader type**: Select **VTAP Reader** from the dropdown.
* **Reader ID**: Enter the reader’s serial number (printed on the back of the device, e.g., `CC123456`).
3. **Select Reader Setup Options**
* For automatic configuration, choose **Yes** under *Do you want to automatically set up the reader?*
* Under *Do you have your own VTAP Cloud Account?*, select:
* **No** if using PassEntry’s VTAP Cloud account, or
* **Yes** if you bought your readers independently and they are managed through your VTAP Cloud account.
* **VTAP Cloud Account**: If using your own VTAP Cloud account, enter the API key (please [contact VTAP support](mailto:vtap.support@dotorigin.com) to get the API key).
4. **Set Location and Network**
* **Location**: Provide a label for where the reader is physically located (e.g., `PassEntry HQ`).
* **WiFi Credentials**: Enter the network SSID and password to connect the reader to WiFi.
5. **Save Configuration**. The reader will be automatically configured using the information provided.
To receive the updated configuration, the reader must be online. Follow these steps to ensure a proper connection:
1. Plug the reader into a laptop or power supply.
2. Wait for the LED to change from flashing red to flashing blue (3 minutes). Flashing blue indicates the reader couldn’t connect to the internet and is now in hotspot mode.
3. On your laptop, open the list of available Wi-Fi networks and select the **reader's serial number**, use WPA-PSK security and **password 'passreader'** to connect.
4. After that you should get redirected to a webpage called ‘Sign in to READER\_SERIAL’. If this does not happen automatically, open a web browser, on the phone or laptop on the 'READER\_SERIAL Setup' network, and go to [http://192.168.4.1](http://192.168.4.1)
5. Follow the on-screen instructions to manually add a temporary Wi-Fi connection.
6. Once connected, the reader will receive the configuration and the LED will switch to a steady blue light.
This confirms the reader is online and has successfully received the updated configuration.
***
## After Setup
Once the reader is set up, you’ll see a **“Completed”** status in the Dashboard.
If the setup fails for any reason, please contact [PassEntry Support](mailto:support@passentry.com) — we’ll assist you with troubleshooting.
After setup, you can manage the following directly from the PassEntry Dashboard:
* Edit the reader's name and location
* Update WiFi credentials
* Adjust [validation settings](https://app.passentry.com/readers/reader-configuration)
All configuration changes are automatically synced with the VTAP reader.